Ruby
In the world of modern web application development, Ruby is one of the most popular programming languages due to its simple syntax and its ability to build fast and efficient applications. To be able to run Ruby applications optimally in the Apache Web Server environment on AlmaLinux 8, a proper installation process and careful configuration are required. This guide will cover in detail each step to install Ruby and its integration with Apache, especially on the stable AlmaLinux 8 operating system and is widely used in server environments.
Prerequisites
- Full
rootaccess - Apache/HTTPD installed
- Basic Linux Command Line
- Security
Ruby Installation
Before starting the installation process, ensure that your server is up to date and has root access or a user with sudo privileges. Then, update and install the development tools required by Ruby:
dnf update -y
dnf install -y curl gnupg2 gcc gcc-c++ make
Make sure Apache is installed, if not, run the following command to install Apache:
dnf install httpd -y
systemctl enable --now httpd
Once Apache is running, make sure ports 80 and 443 are opened in the firewall:
firewall-cmd --permanent --add-service={http,https}
firewall-cmd --reload
Install RVM (Ruby Version Manager)
The best and most flexible way to install Ruby is by using RVM (Ruby Version Manager).
Run the following command to import the RVM GPGP key:
gpg --keyserver keyserver.ubuntu.com --recv-keys 409B6B1796C275462A1703113804BB82D39DC0E3 7D2BAF1CF37B13E2069D6956105BD0E739499BDB
Here is an example of the output:
gpg: directory '/root/.gnupg' created
gpg: keybox '/root/.gnupg/pubring.kbx' created
gpg: key 105BD0E739499BDB: 1 duplicate signature removed
gpg: /root/.gnupg/trustdb.gpg: trustdb created
gpg: key 105BD0E739499BDB: public key "Piotr Kuczynski <piotr.kuczynski@gmail.com>" imported
gpg: key 3804BB82D39DC0E3: public key "Michal Papis (RVM signing) <mpapis@gmail.com>" imported
gpg: Total number processed: 2
gpg:               imported: 2
Then run the following command to install RVM:
curl -sSL https://get.rvm.io | bash -s stable
Example of installation process output:
Installing RVM to /usr/local/rvm/
Installation of RVM in /usr/local/rvm/ is almost complete:

  * First you need to add all users that will be using rvm to 'rvm' group,
    and logout - login again, anyone using rvm will be operating with `umask u=rwx,g=rwx,o=rx`.

  * To start using RVM you need to run `source /etc/profile.d/rvm.sh`
    in all your open shell windows, in rare cases you need to reopen all shell windows.
  * Please do NOT forget to add your users to the rvm group.
     The installer no longer auto-adds root or users to the rvm group. Admins must do this.
     Also, please note that group memberships are ONLY evaluated at login time.
     This means that users must log out then back in before group membership takes effect!
Thanks for installing RVM 🙏
Please consider donating to our open collective to help us maintain RVM.

👉  Donate: https://opencollective.com/rvm/donate
Then enable RVM:
source /etc/profile.d/rvm.sh
rvm reload
Then list the available Ruby versions:
rvm list known
Once RVM is installed, we can easily install the latest version of Ruby by running the following command:
Using RVM, we can install the latest Ruby version even if it's not listed. We simply add the following parameter: ruby-$RUBY.VERSION. To download the latest Ruby version, please visit the official website: https://www.ruby-lang.org/en/downloads/.
rvm install ruby-3.3.8
rvm use ruby-3.3.8 --default
Verify:
ruby --version
Example output:
ruby 3.3.8 (2025-04-09 revision b200bad6cd) [x86_64-linux]
Ruby Virtualhost Configuration in Apache
To run Ruby applications in Apache, one common approach is to use Phusion Passenger. Passenger enables Ruby integration into Apache with excellent performance.
Add the Phusion Passenger repository:
dnf install -y epel-release
dnf config-manager --set-enabled powertools
curl --fail -sSL https://oss-binaries.phusionpassenger.com/yum/definitions/el-passenger.repo -o /etc/yum.repos.d/passenger.repo
dnf install -y mod_passenger
Then restart Apache:
apachectl configtest
systemctl restart httpd
Check Passenger version:
passenger -v
Example output:
Phusion Passenger(R) 6.0.27
Verify that Passenger is active:
passenger-config validate-install
Example output:
What would you like to validate?
Use <space> to select.
If the menu doesn't display correctly, press '!'

 ‣ ⬢  Passenger itself
   ⬡  Apache

-------------------------------------------------------------------------

 * Checking whether this Passenger install is in PATH... ✓
 * Checking whether there are no other Passenger installations... ✓

Everything looks good. :-)
Verify passenger module
httpd -M | grep passenger
Example output:
passenger_module (shared)
Create the following virtualhost:
nano /etc/httpd/conf.d/focusnic.biz.id.conf
Fill in the following parameters:
<VirtualHost *:80>
    ServerAdmin webmaster@focusnic.biz.id
    ServerName focusnic.biz.id
    ServerAlias www.focusnic.biz.id
    DocumentRoot /var/www/focusnic.biz.id/public
    PassengerAppRoot /var/www/focusnic.biz.id

    <Directory /var/www/focusnic.biz.id/public>
        Allow from all
        Options -MultiViews
        Require all granted
    </Directory>

    ErrorLog /var/log/httpd/focusnic.biz.id-error.log
    CustomLog /var/log/httpd/focusnic.biz.id-access.log combined
</VirtualHost>
Then create a directory for Ruby:
mkdir -p /var/www/focusnic.biz.id/public
Save the configuration after making changes:
systemctl restart httpd
Create a Simple Application Structure for Ruby
Passenger requires a config.ru and a public/ folder. The folder structure should look like this:
/var/www/focusnic.biz.id/
├── config.ru
├── hello.rb
└── public/
    └── .htaccess (boleh kosong)
Create a simple script:
cd /var/www/focusnic.biz.id
touch public/.htaccess
nano hello.rb
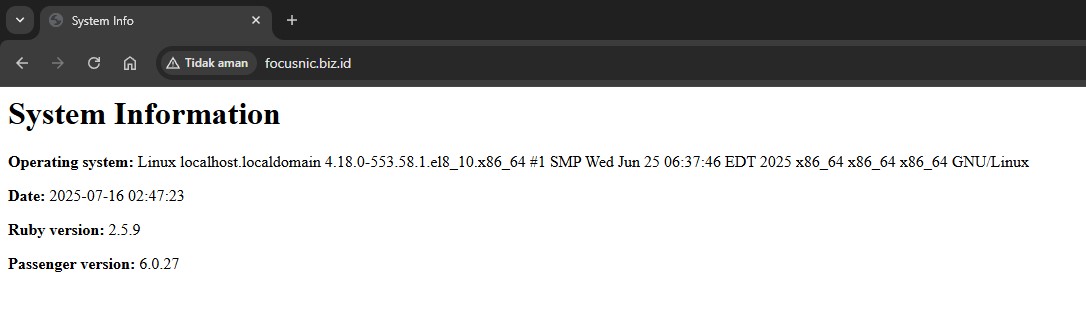
Fill the hello.rb file with the Ruby script:
def system_info
  os_info = `uname -a`.strip
  current_time = Time.now.strftime("%Y-%m-%d %H:%M:%S")
  ruby_version = RUBY_VERSION
  passenger_version = PhusionPassenger::VERSION_STRING

  <<~HTML
    <html>
    <head><title>System Info</title></head>
    <body>
      <h1>System Information</h1>
      <p><strong>Operating system:</strong> #{os_info}</p>
      <p><strong>Date:</strong> #{current_time}</p>
      <p><strong>Ruby version:</strong> #{ruby_version}</p>
      <p><strong>Passenger version:</strong> #{passenger_version}</p>
    </body>
    </html>
  HTML
end
Then create the config.ru file:
nano config.ru
Fill in the following parameters:
require './hello'

run lambda { |env|
  [200, { "Content-Type" => "text/html" }, [system_info]]
}
Adjust permissions:
chown -R apache:apache /var/www/focusnic.biz.id
Then restart Apache:
systemctl restart httpd
Open the browser by typing http://$DOMAIN_NAME
Difference between .rb and .ru in Ruby
| Extension | Abbreviation / Meaning | Used For | Example |
|---|---|---|---|
.rb | Ruby file | Regular Ruby script, including classes, modules, CLI | script.rb, hello.rb |
.ru | Rack Up | The main configuration file of Rack-based applications such as Passenger, Puma, Unicorn, etc. | config.ru |
Why Need to Restart Apache After Changing config.ru or .rb file?
By default, Passenger in production mode does not automatically detect file changes, for performance and efficiency reasons.
Passenger caches Ruby applications when they are first loaded by Apache. This means:
- When Apache first accesses
config.ru, the entire Ruby environment is loaded. - All
.rbfiles currently in use are loaded into memory. - Changes to files are not recognized unless Passenger is instructed to reload the application.
You can run the following command to reload Passenger:
passenger-config restart-app
Passenger provides a graceful way to reload without restarting Apache: simply create a file named /tmp/restart.txt.
Unlike passenger-config restart-app, the restart.txt file does not immediately reload the application. Passenger checks for timestamp changes on every request, but at a rate that is limited for performance reasons.
mkdir /var/www/focusnic.biz.id/tmp
touch /var/www/focusnic.biz.id/restart.txt
Apart from the restart.txt file, Passenger has another magic restart file called always_restart.txt
Passenger also supports the magic file tmp/always_restart.txt. If this file exists, Passenger will restart your application after every request. This way, you don't need to run the restart command frequently.
mkdir /var/www/focusnic.biz.id/tmp
touch /var/www/focusnic.biz.id/always_restart.txt
Troubleshooting
- Application Does Not Appear in Browser / Blank Page
The cause is likely due to a config.ru error, the file not being owned by the apache user, or not using the correct folder structure public and config.ru.
- Passenger Not Detected / Not Moving
This is because mod_passenger is not loaded or installed. Check the module using the following command:
httpd -M | grep passenger
Make sure this file exists:
/etc/httpd/conf.modules.d/10-passenger.conf
Restart Apache:
apachectl configtest
systemctl restart httpd
- Changes to
info.rborconfig.ruNot Visible
Passenger is running the application in cache/production mode. Please restart Apache:
apachectl configtest
systemctl restart httpd
- Access Denied / 403 Forbidden
The public directory has not been granted proper permissions. Please adjust the permissions:
chmod -R 755 /var/www/focusnic.biz.id
chown -R apache:apache /var/www/focusnic.biz.id
Conclusion
Installing and configuring Ruby on Apache Web Server on AlmaLinux 8 with Passenger provides a robust platform for running high-performance Ruby and Ruby on Rails applications.
Q: Do you always have to use config.ru?
A: Yes. To run Ruby applications with Passenger, the config.ru file is a Rack standard and must be used as the application's entry point.
Q: Can I use the .rb script directly without config.ru?
A: Not directly accessible via the web. The .rb script must be run through config.ru using the Rack middleware to be served by Passenger.
Q: Why is the public/ folder necessary even if it's empty?
A: Passenger and Apache require the public/ folder to be the DocumentRoot. Static HTML files or regular .htaccess files can also be placed here if needed.
Q: Can you add SSL and a public domain?
A: Sure. Use Let's Encrypt or a paid certificate, and point the domain to the server IP. Then, change the virtual host configuration to port 443 with SSLEngine on.