Multi PHP Version
Managing multiple PHP versions on a single server is a crucial requirement, especially for shared hosting environments or developers working on various PHP-based applications. On Apache Web Server on AlmaLinux 8, we can run multiple PHP versions simultaneously using the right approach. This guide will walk you through completely, in detail, and practically how to set up an Apache environment to run multiple PHP versions on an AlmaLinux 8 system, from installation to virtual host configuration.
Prerequisites
- Full
rootaccess - Apache/HTTPD installed
- Basic Linux Command Line
- Domain (opsional)
Preparation
Before starting the installation and configuration, ensure your system is up-to-date and stable. Update the system using the following command:
dnf update -y
We'll also need additional repositories for Remi and Epel because the default PHP version is very limited. Add the Remi repository with the following command:
dnf install -y https://rpms.remirepo.net/enterprise/remi-release-8.rpm
dnf install epel-release -y
Reset the PHP module so that we are not tied to just one version:
dnf module reset php -y
Then list the available PHP using the following command:
dnf module list php
Output example:
AlmaLinux 8 - AppStream
Name                                 Stream                                   Profiles                                                   Summary
php                                  7.2 [d]                                  common [d], devel, minimal                                 PHP scripting language
php                                  7.3                                      common [d], devel, minimal                                 PHP scripting language
php                                  7.4                                      common [d], devel, minimal                                 PHP scripting language
php                                  8.0                                      common [d], devel, minimal                                 PHP scripting language
php                                  8.2                                      common [d], devel, minimal                                 PHP scripting language

Remi's Modular repository for Enterprise Linux 8 - x86_64
Name                                 Stream                                   Profiles                                                   Summary
php                                  remi-7.2                                 common [d], devel, minimal                                 PHP scripting language
php                                  remi-7.3                                 common [d], devel, minimal                                 PHP scripting language
php                                  remi-7.4                                 common [d], devel, minimal                                 PHP scripting language
php                                  remi-8.0                                 common [d], devel, minimal                                 PHP scripting language
php                                  remi-8.1                                 common [d], devel, minimal                                 PHP scripting language
php                                  remi-8.2                                 common [d], devel, minimal                                 PHP scripting language
php                                  remi-8.3                                 common [d], devel, minimal                                 PHP scripting language
php                                  remi-8.4                                 common [d], devel, minimal                                 PHP scripting language
Then make sure Apache is installed, if it is not installed, run the following command:
dnf install httpd -y
systemctl enable --now httpd
Make sure port 80/443 is open, if using firewalld run the following command:
firewall-cmd --permanent --add-service={http,https}
firewall-cmd --reload
Check the Proxy module required by PHP because later it will use a connection via socket:
httpd -M | grep proxy
Output example:
proxy_fcgi_module (shared)
proxy_module (shared)
Install Multi PHP
The next step is to install the different PHP versions. For example, let's say we want to use PHP 7.4, 8.0, and 8.1. We'll use the Remi repository to install them all sequentially.
Make sure to install the PHP version according to your needs or application.
PHP 7.2
Run the following command to install PHP 7.2:
dnf module reset php
dnf module enable php:remi-7.2
dnf install php72 php72-php php72-php-cli php72-php-fpm php72-php-mysqlnd php72-php-gd php72-php-mbstring php72-php-xml php72-php-opcache
Verify PHP 7.2 installation:
php72 -v
Output example:
PHP 7.2.34 (cli) (built: Nov 26 2024 07:18:04) ( NTS )
Copyright (c) 1997-2018 The PHP Group
Zend Engine v3.2.0, Copyright (c) 1998-2018 Zend Technologies
    with Zend OPcache v7.2.34, Copyright (c) 1999-2018, by Zend Technologies
Virtualhost for PHP 7.2:
nano /etc/httpd/conf.d/php72.focusnic.biz.id.conf
Fill in the following parameters:
<VirtualHost *:80>
    ServerAdmin webmaster@focusnic.biz.id
    ServerName php72.focusnic.biz.id
    DocumentRoot /var/www/php72.focusnic.biz.id/public_html

    <FilesMatch \.php$>
        SetHandler "proxy:unix:/var/opt/remi/php72/run/php-fpm/www.sock|fcgi://localhost"
    </FilesMatch>

    ErrorLog /var/log/httpd/php72.focusnic.biz.id-error.log
    CustomLog /var/log/httpd/php72.focusnic.biz.id-access.log combined
</VirtualHost>
Create a directory for the virtualhost above:
mkdir -p /var/www/php72.focusnic.biz.id/public_html
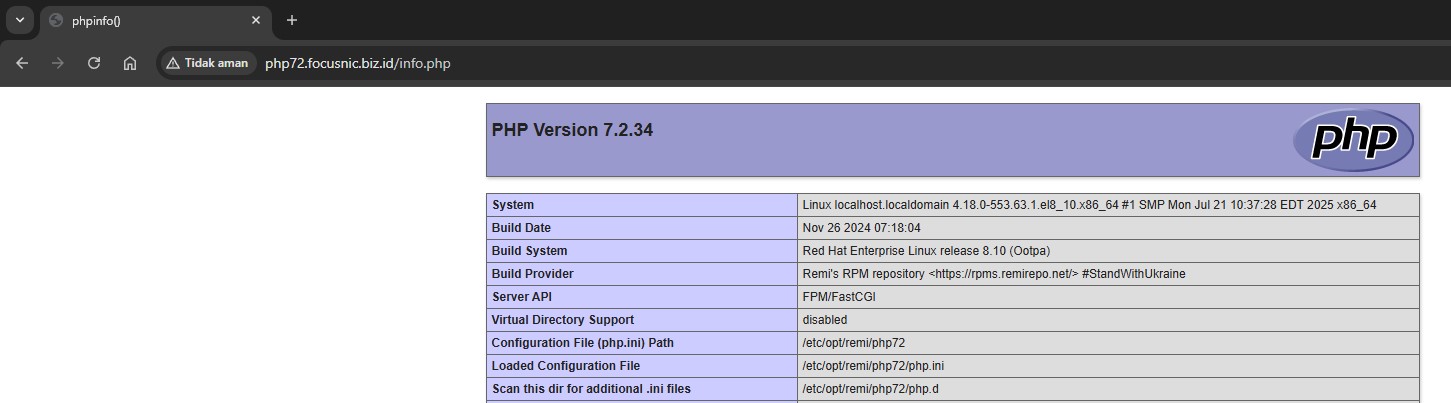
Then create an info.php file to test the PHP 7.2 installation:
echo "<?php phpinfo(); ?>" | tee /var/www/php72.focusnic.biz.id/public_html/info.php
Then enable the php72-php-fpm service and restart Apache after making the changes:
systemctl enable --now php72-php-fpm
systemctl restart httpd
Then access via browser http://php72.focusnic.biz.id/info.php
PHP 7.3
Run the following command to install PHP 7.3:
dnf module reset php
dnf module enable php:remi-7.3
dnf install php73 php73-php php73-php-cli php73-php-fpm php73-php-mysqlnd php73-php-gd php73-php-mbstring php73-php-xml php73-php-opcache
Verify PHP 7.3 installation:
php73 -v
Output example:
PHP 7.3.33 (cli) (built: Nov 28 2024 11:42:24) ( NTS )
Copyright (c) 1997-2018 The PHP Group
Zend Engine v3.3.33, Copyright (c) 1998-2018 Zend Technologies
    with Zend OPcache v7.3.33, Copyright (c) 1999-2018, by Zend Technologies
Virtualhost for PHP 7.3:
nano /etc/httpd/conf.d/php73.focusnic.biz.id.conf
Fill in the following parameters:
<VirtualHost *:80>
    ServerAdmin webmaster@focusnic.biz.id
    ServerName php73.focusnic.biz.id
    DocumentRoot /var/www/php73.focusnic.biz.id/public_html

    <FilesMatch \.php$>
        SetHandler "proxy:unix:/var/opt/remi/php73/run/php-fpm/www.sock|fcgi://localhost"
    </FilesMatch>

    ErrorLog /var/log/httpd/php73.focusnic.biz.id-error.log
    CustomLog /var/log/httpd/php73.focusnic.biz.id-access.log combined
</VirtualHost>
Create a directory for the virtualhost above:
mkdir -p /var/www/php73.focusnic.biz.id/public_html
Then create an info.php file to test the PHP 7.3 installation:
echo "<?php phpinfo(); ?>" | tee /var/www/php73.focusnic.biz.id/public_html/info.php
Then enable the php73-php-fpm service and restart Apache after making the changes:
systemctl enable --now php73-php-fpm
systemctl restart httpd
Then access via browser http://php73.focusnic.biz.id/info.php

PHP 7.4
Run the following command to install PHP 7.4:
dnf module reset php
dnf module enable php:remi-7.4
dnf install php74 php74-php php74-php-cli php74-php-fpm php74-php-mysqlnd php74-php-gd php74-php-mbstring php74-php-xml php74-php-opcache
Verify PHP 7.4 installation:
php74 -v
Output example:
PHP 7.4.33 (cli) (built: Jul  3 2025 13:25:15) ( NTS )
Copyright (c) The PHP Group
Zend Engine v3.4.0, Copyright (c) Zend Technologies
    with Zend OPcache v7.4.33, Copyright (c), by Zend Technologies
Virtualhost for PHP 7.4:
nano /etc/httpd/conf.d/php74.focusnic.biz.id.conf
Fill in the following parameters:
<VirtualHost *:80>
    ServerAdmin webmaster@focusnic.biz.id
    ServerName php74.focusnic.biz.id
    DocumentRoot /var/www/php74.focusnic.biz.id/public_html

    <FilesMatch \.php$>
        SetHandler "proxy:unix:/var/opt/remi/php74/run/php-fpm/www.sock|fcgi://localhost"
    </FilesMatch>

    ErrorLog /var/log/httpd/php74.focusnic.biz.id-error.log
    CustomLog /var/log/httpd/php74.focusnic.biz.id-access.log combined
</VirtualHost>
Create a directory for the virtualhost above:
mkdir -p /var/www/php74.focusnic.biz.id/public_html
Then create an info.php file to test the PHP 7.4 installation:
echo "<?php phpinfo(); ?>" | tee /var/www/php74.focusnic.biz.id/public_html/info.php
Then enable the php74-php-fpm service and restart Apache after making the changes:
systemctl enable --now php74-php-fpm
systemctl restart httpd
Then access via browser http://php74.focusnic.biz.id/info.php

PHP 8.0
Run the following command to install PHP 8.0:
dnf module reset php
dnf module enable php:remi-8.0
dnf install php80 php80-php php80-php-cli php80-php-fpm php80-php-mysqlnd php80-php-gd php80-php-mbstring php80-php-xml php80-php-opcache
Verify PHP 8.0 installation:
php80 -v
Output example:
PHP 8.0.30 (cli) (built: Jul  3 2025 08:01:28) ( NTS gcc x86_64 )
Copyright (c) The PHP Group
Zend Engine v4.0.30, Copyright (c) Zend Technologies
    with Zend OPcache v8.0.30, Copyright (c), by Zend Technologies
Virtualhost for PHP 8.0:
nano /etc/httpd/conf.d/php80.focusnic.biz.id.conf
Fill in the following parameters:
<VirtualHost *:80>
    ServerAdmin webmaster@focusnic.biz.id
    ServerName php80.focusnic.biz.id
    DocumentRoot /var/www/php80.focusnic.biz.id/public_html

    <FilesMatch \.php$>
        SetHandler "proxy:unix:/var/opt/remi/php80/run/php-fpm/www.sock|fcgi://localhost"
    </FilesMatch>

    ErrorLog /var/log/httpd/php80.focusnic.biz.id-error.log
    CustomLog /var/log/httpd/php80.focusnic.biz.id-access.log combined
</VirtualHost>
Create a directory for the virtualhost above:
mkdir -p /var/www/php80.focusnic.biz.id/public_html
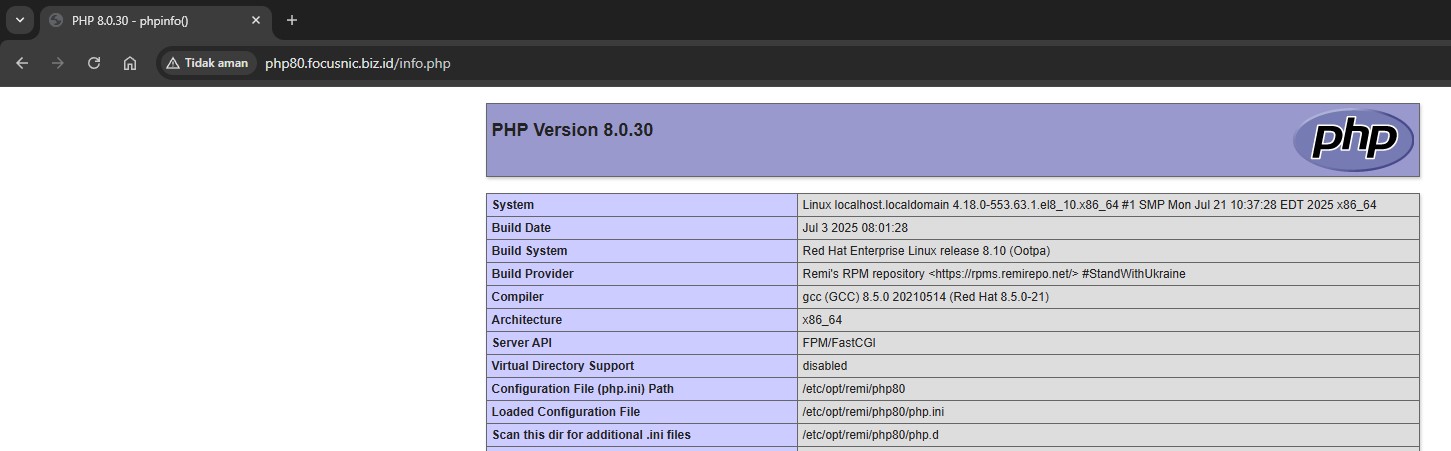
Then create an info.php file to test the PHP 8.0 installation:
echo "<?php phpinfo(); ?>" | tee /var/www/php80.focusnic.biz.id/public_html/info.php
Then enable the php80-php-fpm service and restart Apache after making the changes:
systemctl enable --now php80-php-fpm
systemctl restart httpd
Then access via browser http://php80.focusnic.biz.id/info.php
PHP 8.1
Run the following command to install PHP 8.1:
dnf module reset php
dnf module enable php:remi-8.1
dnf install php81 php81-php php81-php-cli php81-php-fpm php81-php-mysqlnd php81-php-gd php81-php-mbstring php81-php-xml php81-php-opcache
Verify PHP 8.1 installation:
php81 -v
Output example:
PHP 8.1.33 (cli) (built: Jul  1 2025 21:17:52) (NTS gcc x86_64)
Copyright (c) The PHP Group
Zend Engine v4.1.33, Copyright (c) Zend Technologies
    with Zend OPcache v8.1.33, Copyright (c), by Zend Technologies
Virtualhost for PHP 8.1:
nano /etc/httpd/conf.d/php81.focusnic.biz.id.conf
Fill in the following parameters:
<VirtualHost *:80>
    ServerAdmin webmaster@focusnic.biz.id
    ServerName php81.focusnic.biz.id
    DocumentRoot /var/www/php81.focusnic.biz.id/public_html

    <FilesMatch \.php$>
        SetHandler "proxy:unix:/var/opt/remi/php81/run/php-fpm/www.sock|fcgi://localhost"
    </FilesMatch>

    ErrorLog /var/log/httpd/php81.focusnic.biz.id-error.log
    CustomLog /var/log/httpd/php81.focusnic.biz.id-access.log combined
</VirtualHost>
Create a directory for the virtualhost above:
mkdir -p /var/www/php81.focusnic.biz.id/public_html
Then create an info.php file to test the PHP 8.1 installation:
echo "<?php phpinfo(); ?>" | tee /var/www/php81.focusnic.biz.id/public_html/info.php
Then enable the php81-php-fpm service and restart Apache after making the changes:
systemctl enable --now php81-php-fpm
systemctl restart httpd
Then access via browser http://php81.focusnic.biz.id/info.php

PHP 8.2
Run the following command to install PHP 8.2:
dnf module reset php
dnf module enable php:remi-8.2
dnf install php82 php82-php php82-php-cli php82-php-fpm php82-php-mysqlnd php82-php-gd php82-php-mbstring php82-php-xml php82-php-opcache
Verify PHP 8.2 installation:
php82 -v
Output example:
PHP 8.2.29 (cli) (built: Jul  1 2025 16:29:21) (NTS gcc x86_64)
Copyright (c) The PHP Group
Zend Engine v4.2.29, Copyright (c) Zend Technologies
    with Zend OPcache v8.2.29, Copyright (c), by Zend Technologies
Virtualhost for PHP 8.2:
nano /etc/httpd/conf.d/php82.focusnic.biz.id.conf
Fill in the following parameters:
<VirtualHost *:80>
    ServerAdmin webmaster@focusnic.biz.id
    ServerName php82.focusnic.biz.id
    DocumentRoot /var/www/php82.focusnic.biz.id/public_html

    <FilesMatch \.php$>
        SetHandler "proxy:unix:/var/opt/remi/php82/run/php-fpm/www.sock|fcgi://localhost"
    </FilesMatch>

    ErrorLog /var/log/httpd/php82.focusnic.biz.id-error.log
    CustomLog /var/log/httpd/php82.focusnic.biz.id-access.log combined
</VirtualHost>
Create a directory for the virtualhost above:
mkdir -p /var/www/php82.focusnic.biz.id/public_html
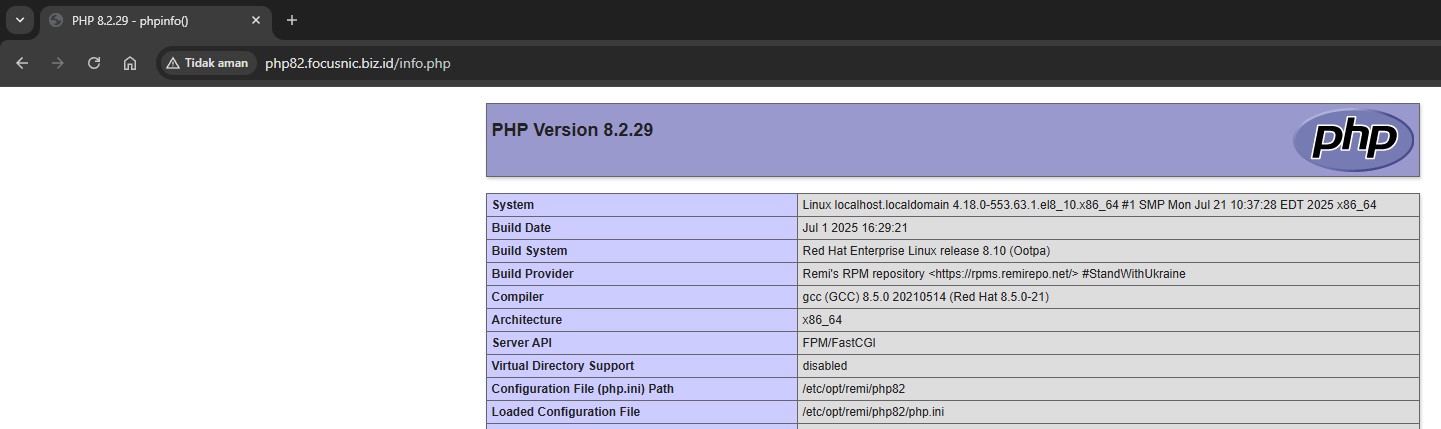
Then create an info.php file to test the PHP 8.2 installation:
echo "<?php phpinfo(); ?>" | tee /var/www/php82.focusnic.biz.id/public_html/info.php
Then enable the php82-php-fpm service and restart Apache after making the changes:
systemctl enable --now php82-php-fpm
systemctl restart httpd
Then access via browser http://php82.focusnic.biz.id/info.php
PHP 8.3
Run the following command to install PHP 8.3:
dnf module reset php
dnf module enable php:remi-8.3
dnf install php83 php83-php php83-php-cli php83-php-fpm php83-php-mysqlnd php83-php-gd php83-php-mbstring php83-php-xml php83-php-opcache
Verify PHP 8.3 installation:
php83 -v
Output example:
PHP 8.3.29 (cli) (built: Jul  1 2025 16:29:21) (NTS gcc x86_64)
Copyright (c) The PHP Group
Zend Engine v4.2.29, Copyright (c) Zend Technologies
    with Zend OPcache v8.3.29, Copyright (c), by Zend Technologies
Virtualhost for PHP 8.3:
nano /etc/httpd/conf.d/php83.focusnic.biz.id.conf
Fill in the following parameters:
<VirtualHost *:80>
    ServerAdmin webmaster@focusnic.biz.id
    ServerName php83.focusnic.biz.id
    DocumentRoot /var/www/php83.focusnic.biz.id/public_html

    <FilesMatch \.php$>
        SetHandler "proxy:unix:/var/opt/remi/php83/run/php-fpm/www.sock|fcgi://localhost"
    </FilesMatch>

    ErrorLog /var/log/httpd/php83.focusnic.biz.id-error.log
    CustomLog /var/log/httpd/php83.focusnic.biz.id-access.log combined
</VirtualHost>
Create a directory for the virtualhost above:
mkdir -p /var/www/php83.focusnic.biz.id/public_html
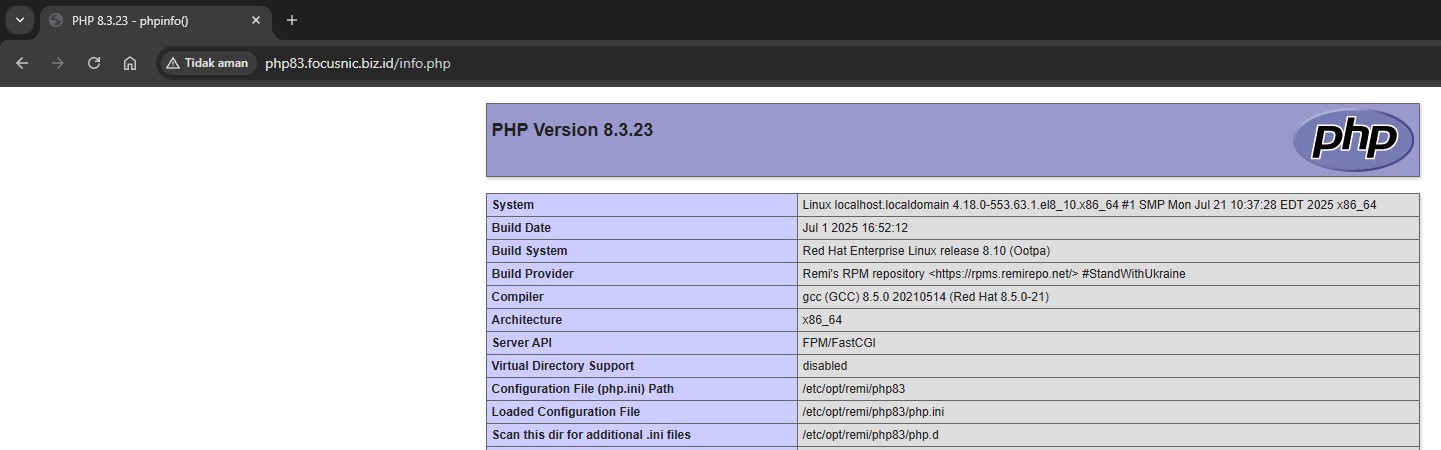
Then create an info.php file to test the PHP 8.3 installation:
echo "<?php phpinfo(); ?>" | tee /var/www/php83.focusnic.biz.id/public_html/info.php
Then enable the php83-php-fpm service and restart Apache after making the changes:
systemctl enable --now php83-php-fpm
systemctl restart httpd
Then access via browser http://php83.focusnic.biz.id/info.php
PHP 8.4
Run the following command to install PHP 8.4:
dnf module reset php
dnf module enable php:remi-8.4
dnf install php84 php84-php php84-php-cli php84-php-fpm php84-php-mysqlnd php84-php-gd php84-php-mbstring php84-php-xml php84-php-opcache
Verify PHP 8.4 installation:
php84 -v
Output example:
PHP 8.4.10 (cli) (built: Jul  2 2025 02:22:42) (NTS gcc x86_64)
Copyright (c) The PHP Group
Built by Remi's RPM repository <https://rpms.remirepo.net/> #StandWithUkraine
Zend Engine v4.4.10, Copyright (c) Zend Technologies
    with Zend OPcache v8.4.10, Copyright (c), by Zend Technologies
Virtualhost for PHP 8.4:
nano /etc/httpd/conf.d/php84.focusnic.biz.id.conf
Fill in the following parameters:
<VirtualHost *:80>
    ServerAdmin webmaster@focusnic.biz.id
    ServerName php84.focusnic.biz.id
    DocumentRoot /var/www/php84.focusnic.biz.id/public_html

    <FilesMatch \.php$>
        SetHandler "proxy:unix:/var/opt/remi/php84/run/php-fpm/www.sock|fcgi://localhost"
    </FilesMatch>

    ErrorLog /var/log/httpd/php84.focusnic.biz.id-error.log
    CustomLog /var/log/httpd/php84.focusnic.biz.id-access.log combined
</VirtualHost>
Create a directory for the virtualhost above:
mkdir -p /var/www/php84.focusnic.biz.id/public_html
Then create an info.php file to test the PHP 8.4 installation:
echo "<?php phpinfo(); ?>" | tee /var/www/php84.focusnic.biz.id/public_html/info.php
Then enable the php84-php-fpm service and restart Apache after making the changes:
systemctl enable --now php84-php-fpm
systemctl restart httpd
Then access via browser http://php84.focusnic.biz.id/info.php

Troubleshooting
- Error: 503 Service Unavailable
Check that the FPM socket is compatible and active. Check the log:
tail -f /var/log/httpd/error_log
- Error: Cannot connect to PHP-FPM
Make sure the path for the socket is correct, replace phpXX according to the PHP you want to use:
    <FilesMatch \.php$>
        SetHandler "proxy:unix:/var/opt/remi/phpXX/run/php-fpm/www.sock|fcgi://localhost"
    </FilesMatch>
Conclusion
By following the guide above, we can run multiple versions of PHP simultaneously on the AlmaLinux 8 Apache Web Server without any conflicts. This technique is very useful for development needs, application migrations, and hosting clients with different PHP requirements.
Q: Can I use more than three versions of PHP at once?
A: Yes, as long as the FPM ports or sockets don't conflict, we can add PHP 7.3, 8.2, etc.
Q: Will each PHP version consume RAM separately?
A: Yes, each php-fpm process will use its own resources, so monitoring and optimizing the configuration is highly recommended.
Q: Can I use Nginx?
A: Yes. However, this guide focuses on the Apache Web Server, and the basic principles remain the same for customizing Nginx configurations.