Complete Guide on How to Install Moodle using LAMP Stack on AlmaLinux 8
In this guide, we'll cover step-by-step how to install Moodle using the LAMP Stack on AlmaLinux 8. Moodle (Modular Object-Oriented Dynamic Learning Environment) is one of the most popular Learning Management System (LMS) platforms and is widely used in education to create flexible and robust online learning environments. We'll configure Moodle with LAMP Stack support (Linux, Apache, MariaDB/MySQL, and PHP), ensuring optimal performance and maximum security.
Prerequisites
- Full root access
- Domain (optional)
- Basic Linux Command Line
Preparation
Make sure the firewall and SELinux have been adjusted or temporarily disabled if you want to avoid problems during the initial installation.
Before starting the Moodle installation, make sure your AlmaLinux 8 server is up to date and ready to install the LAMP Stack (Linux, Apache, MariaDB, PHP).
dnf update -y
dnf install epel-release -y
Install Apache
Apache is a reliable web server and is widely used in production environments. To install it, run the following command:
dnf install httpd -y
Once the installation is complete, enable and start the Apache service with the following command:
systemctl enable --now httpd
To allow access to the server via HTTP and HTTPS, allow the firewall:
firewall-cmd --permanent --add-service={http,https}
firewall-cmd --reload
Install PHP
PHP (Hypertext Preprocessor) is a server-side programming language that is crucial in this stack. We will install PHP 8 from the Remi Repository to use the latest version of PHP.
Run the following command to install the Remi Repository:
dnf install -y https://rpms.remirepo.net/enterprise/remi-release-8.rpm
Then list the available PHP using the following command:
dnf module list php
Output example:
AlmaLinux 8 - AppStream
Name                            Stream                              Profiles                                              Summary
php                             7.2 [d]                             common [d], devel, minimal                            PHP scripting language
php                             7.3                                 common [d], devel, minimal                            PHP scripting language
php                             7.4                                 common [d], devel, minimal                            PHP scripting language
php                             8.0                                 common [d], devel, minimal                            PHP scripting language
php                             8.2                                 common [d], devel, minimal                            PHP scripting language

Remi's Modular repository for Enterprise Linux 8 - x86_64
Name                            Stream                              Profiles                                              Summary
php                             remi-7.2                            common [d], devel, minimal                            PHP scripting language
php                             remi-7.3                            common [d], devel, minimal                            PHP scripting language
php                             remi-7.4                            common [d], devel, minimal                            PHP scripting language
php                             remi-8.0                            common [d], devel, minimal                            PHP scripting language
php                             remi-8.1                            common [d], devel, minimal                            PHP scripting language
php                             remi-8.2                            common [d], devel, minimal                            PHP scripting language
php                             remi-8.3                            common [d], devel, minimal                            PHP scripting language
php                             remi-8.4                            common [d], devel, minimal                            PHP scripting language

Hint: [d]efault, [e]nabled, [x]disabled, [i]nstalled
Enable the desired PHP module version. For example, for PHP 8.4, run the following command:
dnf module reset php -y
dnf module enable php:remi-8.4 -y
Once the repository is active, we can proceed with installing PHP along with the commonly used essential modules:
dnf install -y php php-cli php-common php-mysqlnd php-fpm php-opcache php-gd php-curl php-mbstring php-xml php-json php-soap php-bcmath
Check the installed PHP version with the following command:
php -v
Install MariaDB
MariaDB is a replacement for MySQL and is compatible with MySQL-based applications. Run the following command to install it:
dnf module list mariadb
Output example:
AlmaLinux 8 - AppStream
Name                                Stream                               Profiles                                               Summary
mariadb                             10.3 [d]                             client, galera, server [d]                             MariaDB Module
mariadb                             10.5                                 client, galera, server [d]                             MariaDB Module
mariadb                             10.11                                client, galera, server [d]                             MariaDB Module

Hint: [d]efault, [e]nabled, [x]disabled, [i]nstalled
The output above shows that the default version of MariaDB is 10.11 (the latest version from the OS). However, we'll use MariaDB version 11.4.7 using the official repository at https://mariadb.org/download/ and then reset MariaDB to remove it from the OS's default repository:
dnf module reset mariadb
Run the following command to add the MariaDB version 11.4.7 repository:
nano /etc/yum.repos.d/MariaDB.repo
Add the following parameters:
# MariaDB 11.4 RedHatEnterpriseLinux repository list - created 2025-07-31 14:04 UTC
# https://mariadb.org/download/
[mariadb]
name = MariaDB
# rpm.mariadb.org is a dynamic mirror if your preferred mirror goes offline. See https://mariadb.org/mirrorbits/ for details.
# baseurl = https://rpm.mariadb.org/11.4/rhel/$releasever/$basearch
baseurl = https://mirror.its.dal.ca/mariadb/yum/11.4/rhel/$releasever/$basearch
module_hotfixes = 1
# gpgkey = https://rpm.mariadb.org/RPM-GPG-KEY-MariaDB
gpgkey = https://mirror.its.dal.ca/mariadb/yum/RPM-GPG-KEY-MariaDB
gpgcheck = 1
Then run the following command to install MariaDB:
dnf install MariaDB-server MariaDB-client
Enable and activate the MariaDB service:
systemctl enable --now mariadb
systemctl status mariadb
Before using it for production or testing, it is best to secure the MariaDB installation first by running the following command:
mariadb-secure-installation
Then follow the instructions that appear:
- Enter current password for root (enter for none) → [ENTER]
- Switch to unix_socket authentication → Y
- Change the root password? → Y
- Remove anonymous users? → Y
- Disallow root login remotely? Y
- Remove test database and access to it? Y
- Reload privilege tables now? Y
Install Moodle
Before installing the latest version of Moodle 5, we will first create a virtual host and database (to store Moodle content, configuration, and structure). Run the following command to create a virtual host:
Make sure you use a valid domain (FQDN) and also that the DNS A record is directed or pointed according to the server IP used on the server.
nano /etc/httpd/conf.d/focusnic.biz.id.conf
Fill in the following parameters:
<VirtualHost *:80>
    ServerAdmin webmaster@focusnic.biz.id
    ServerName focusnic.biz.id
    ServerAlias www.focusnic.biz.id
    DocumentRoot /var/www/focusnic.biz.id/public_html

    <Directory /var/www/focusnic.biz.id/public_html>
        AllowOverride All
        Require all granted
    </Directory>

    ErrorLog /var/log/httpd/focusnic.biz.id-error.log
    CustomLog /var/log/httpd/focusnic.biz.id-access.log combined
</VirtualHost>
Then create a directory on the virtualhost above:
mkdir -p /var/www/focusnic.biz.id/public_html
Restart Apache to save changes:
apachectl configtest
systemctl restart httpd
Create a database by running the following command:
mariadb
Then run the following command to create a database, user, and password:
create database moodle_db;
create user 'moodle_user'@'localhost' identified by 'kYHjenQ9NuWTULX1';
grant all on moodle_db.* to 'moodle_user'@'localhost';
flush privileges;
quit;
Download the Moodle file and place it in the appropriate directory for your virtual host. We will download Moodle according to the administrator model to facilitate future updates (reference: https://docs.moodle.org/500/en/Git_for_Administrators):
cd /var/www/focusnic.biz.id/public_html
git clone git://git.moodle.org/moodle.git
cd moodle
git branch --track MOODLE_500_STABLE origin/MOODLE_500_STABLE
git branch -a
git checkout MOODLE_500_STABLE
cd ..
mv moodle/* .
Change the following database type configuration to mariadb:
cd /var/www/focusnic.biz.id/public_html
nano config.php
Adjust the following parameters to mariadb or comment out the current configuration and create a new database type:
//$CFG->dbtype = 'mysqli';
$CFG->dbtype = 'mariadb';
Tweak PHP configuration max_input_vars to 5000:
nano /etc/php.ini
Adjust the following parameters to 5000 or comment out the current configuration and create new values:
;max_input_vars = 1000
max_input_vars=5000
Restart php-fpm to save changes:
systemctl restart php-fpm
Adjust the permissions on the Moodle directory:
chown -R apache:apache /var/www/focusnic.biz.id
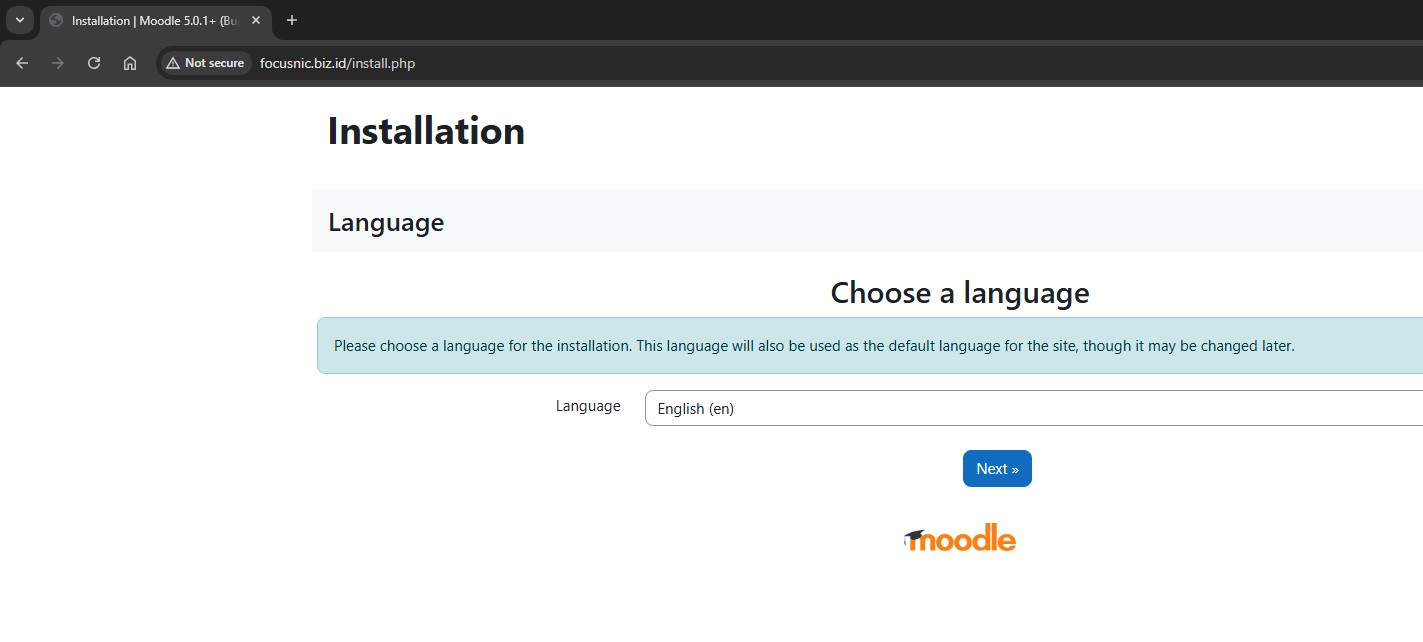
Access the Moodle installation via a browser, for example: http://focusnic.biz.id select the language then click "Next"
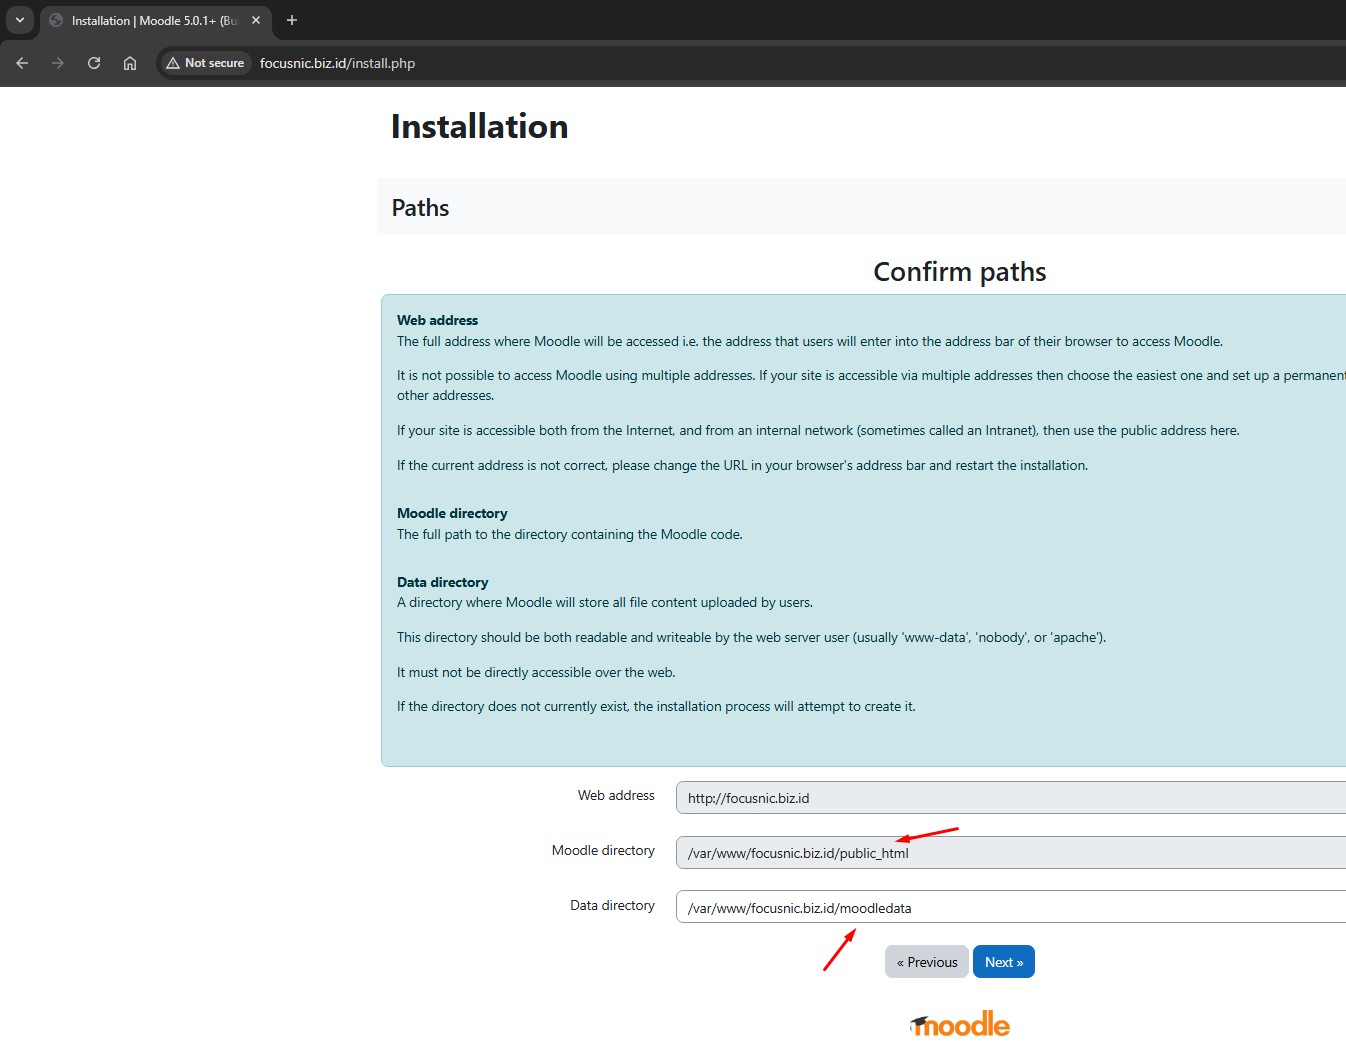
Then confirm the path for the Moodle and Moodle Data directories. It's generally recommended that Moodle Data be located outside of public_html because it contains sensitive data that shouldn't be publicly accessible. Once you've confirmed the Moodle directory path, click "Next."
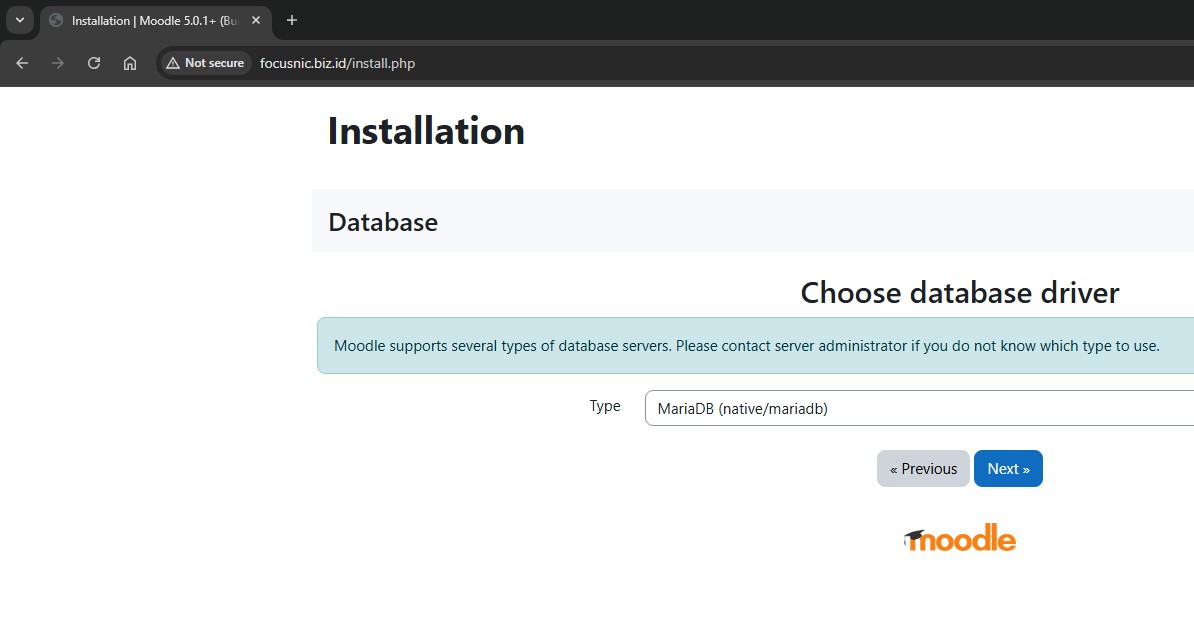
Select the driver database type and then click "Next"
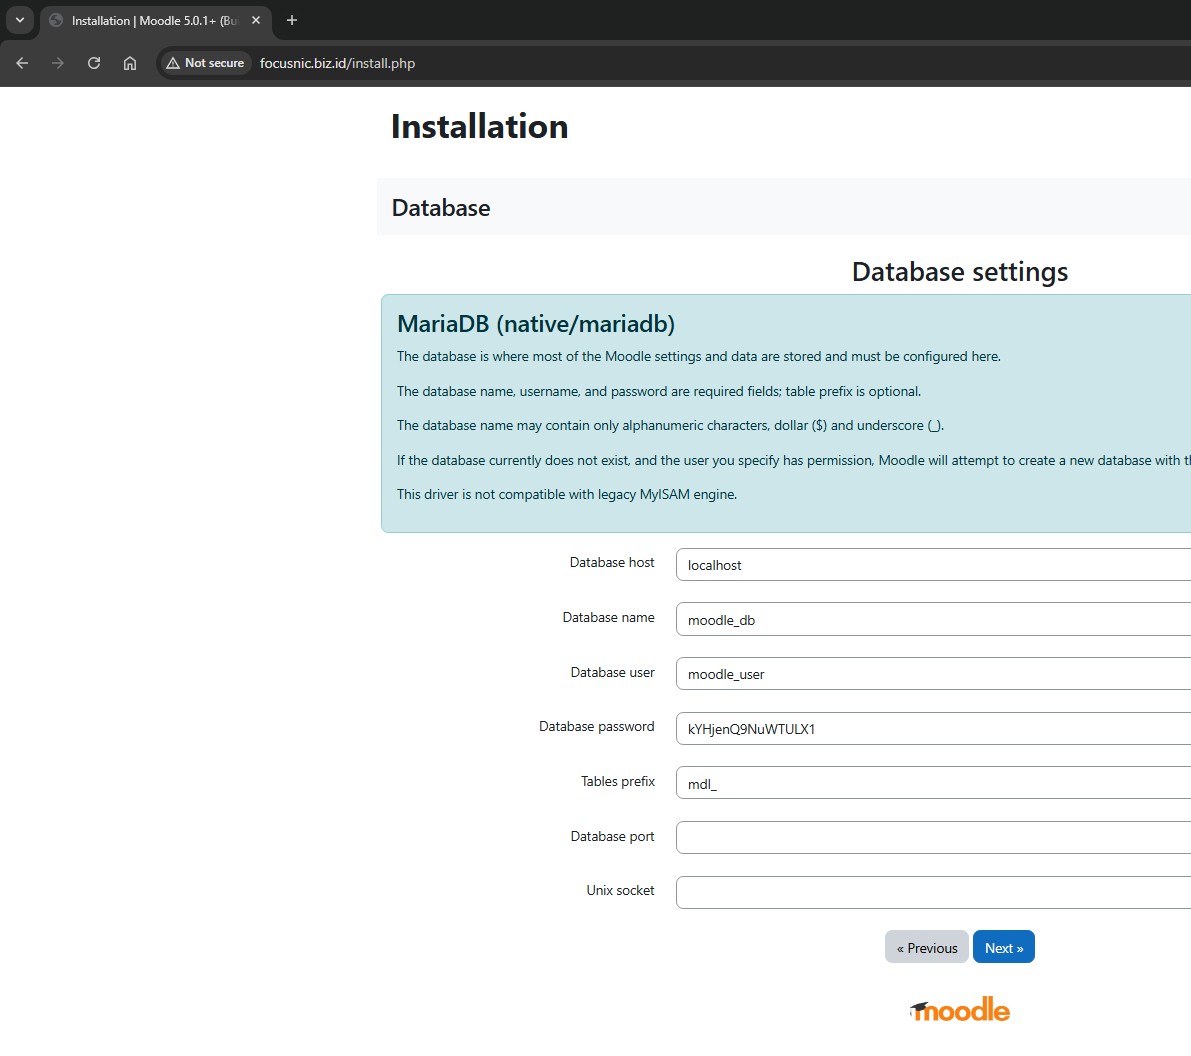
Then, fill in the database information you just created, such as the database name, username, and password. Leave the database port and socket blank, as we'll be using a local database on the same server as the Moodle installation. Once done, click "Next."
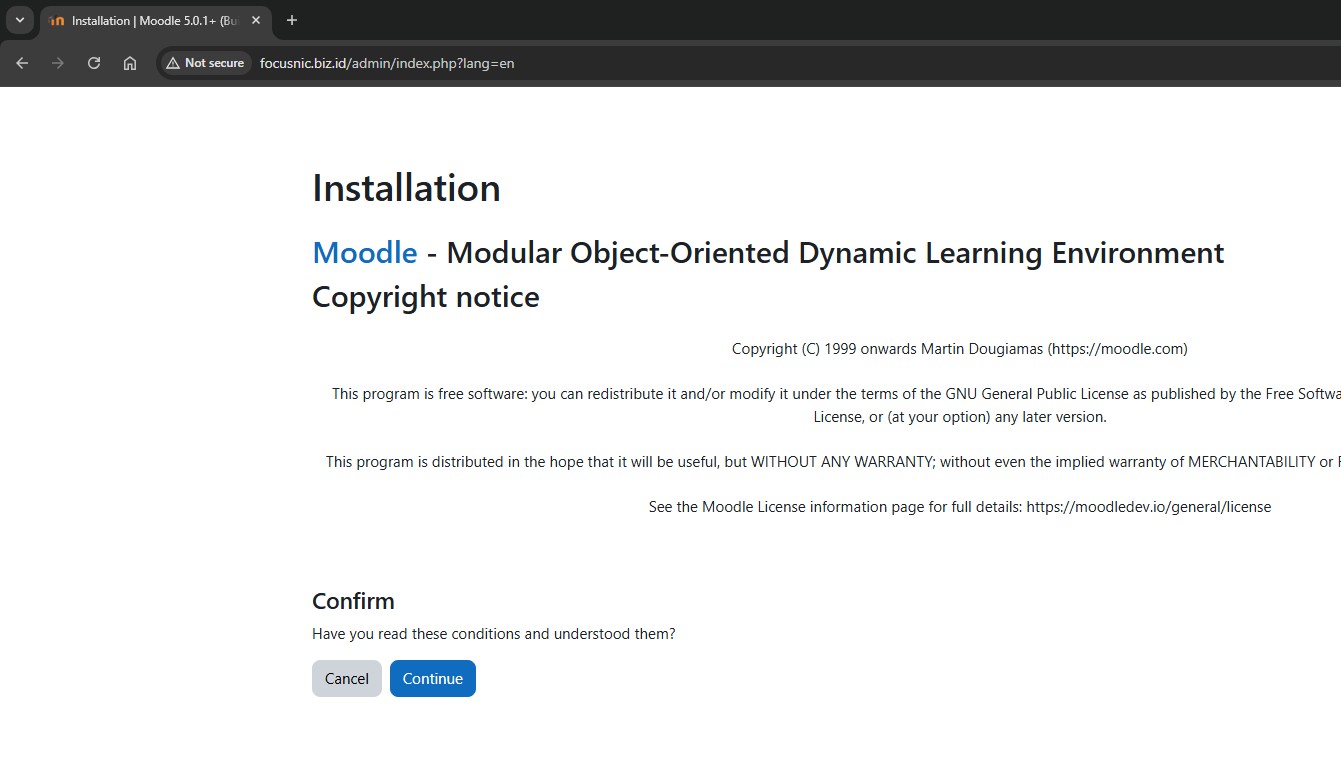
Confirm the Moodle installation and license agreement, then click "Continue"
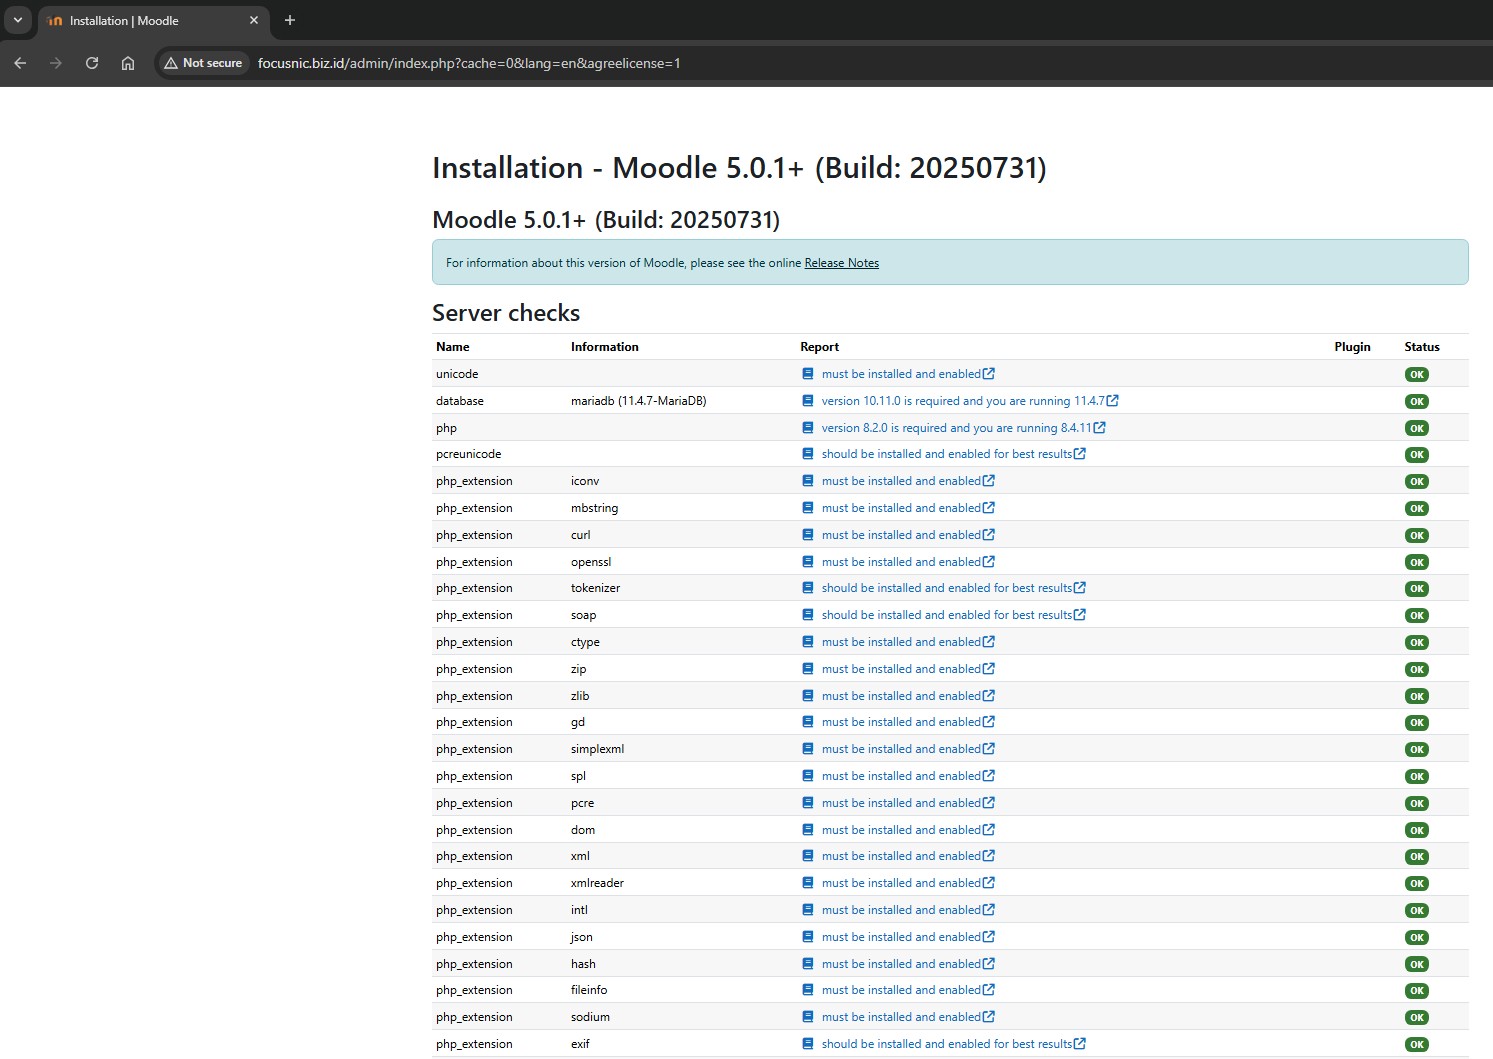
Before begin the installation, Moodle will check to ensure that several server-side requirements are met before the installation can proceed. If so, scroll down and click "Continue" to continue the installation.
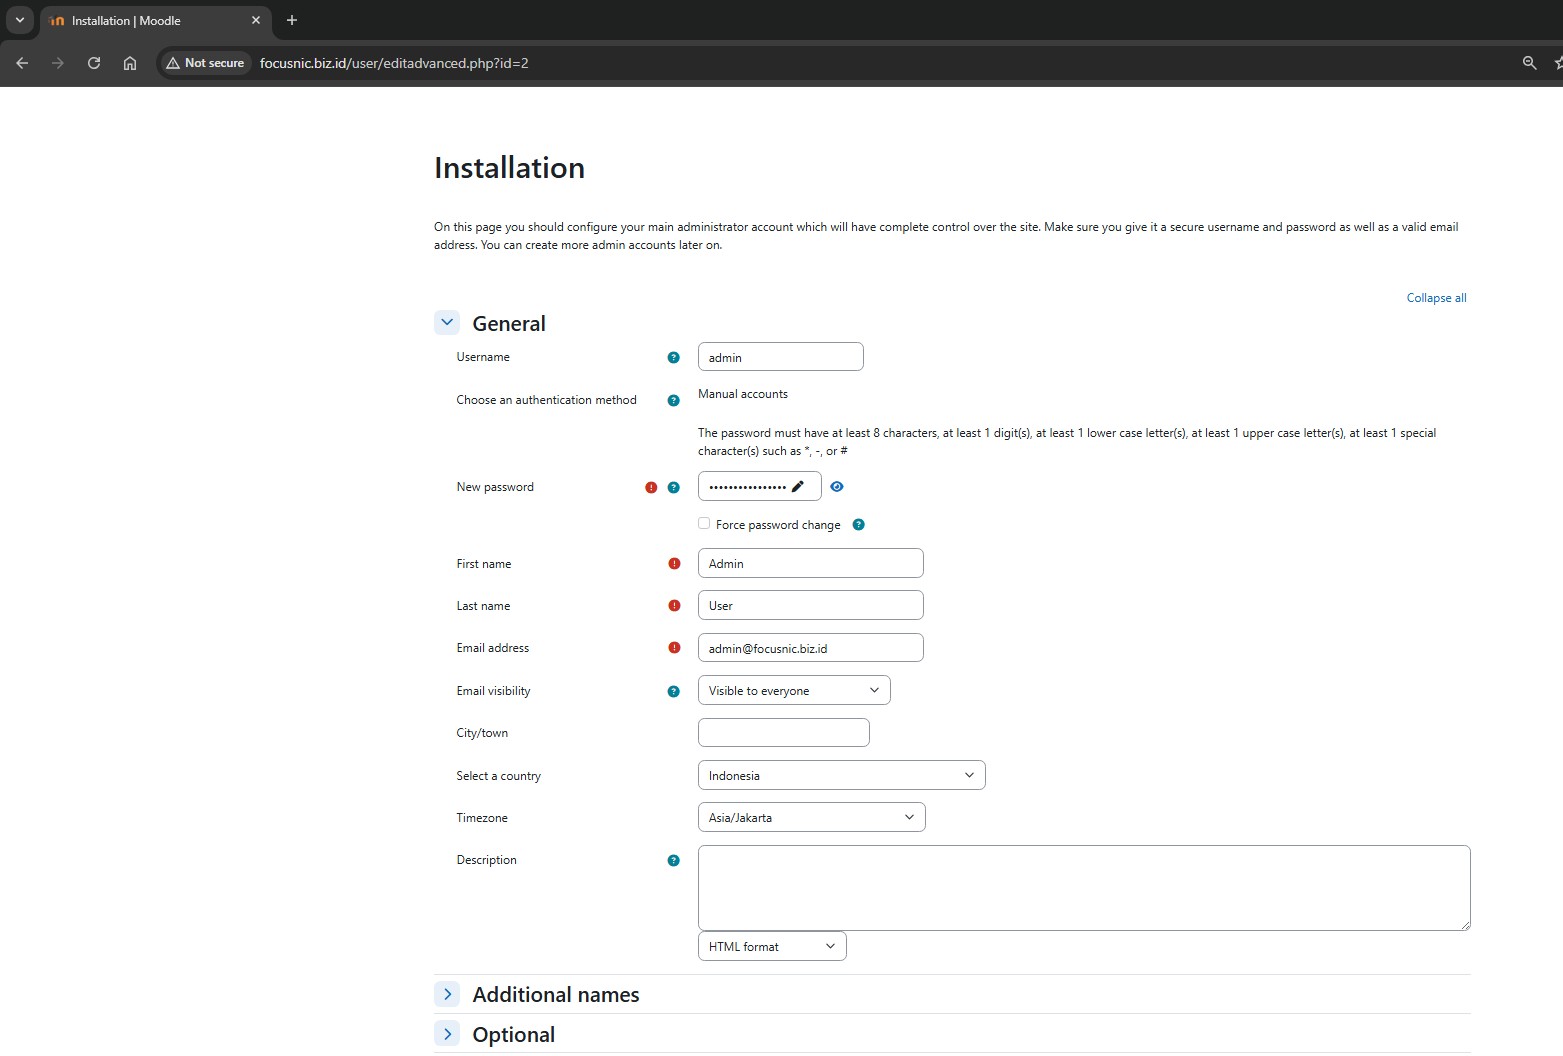
Proceed by creating an admin user for Moodle, then click "Update profile"
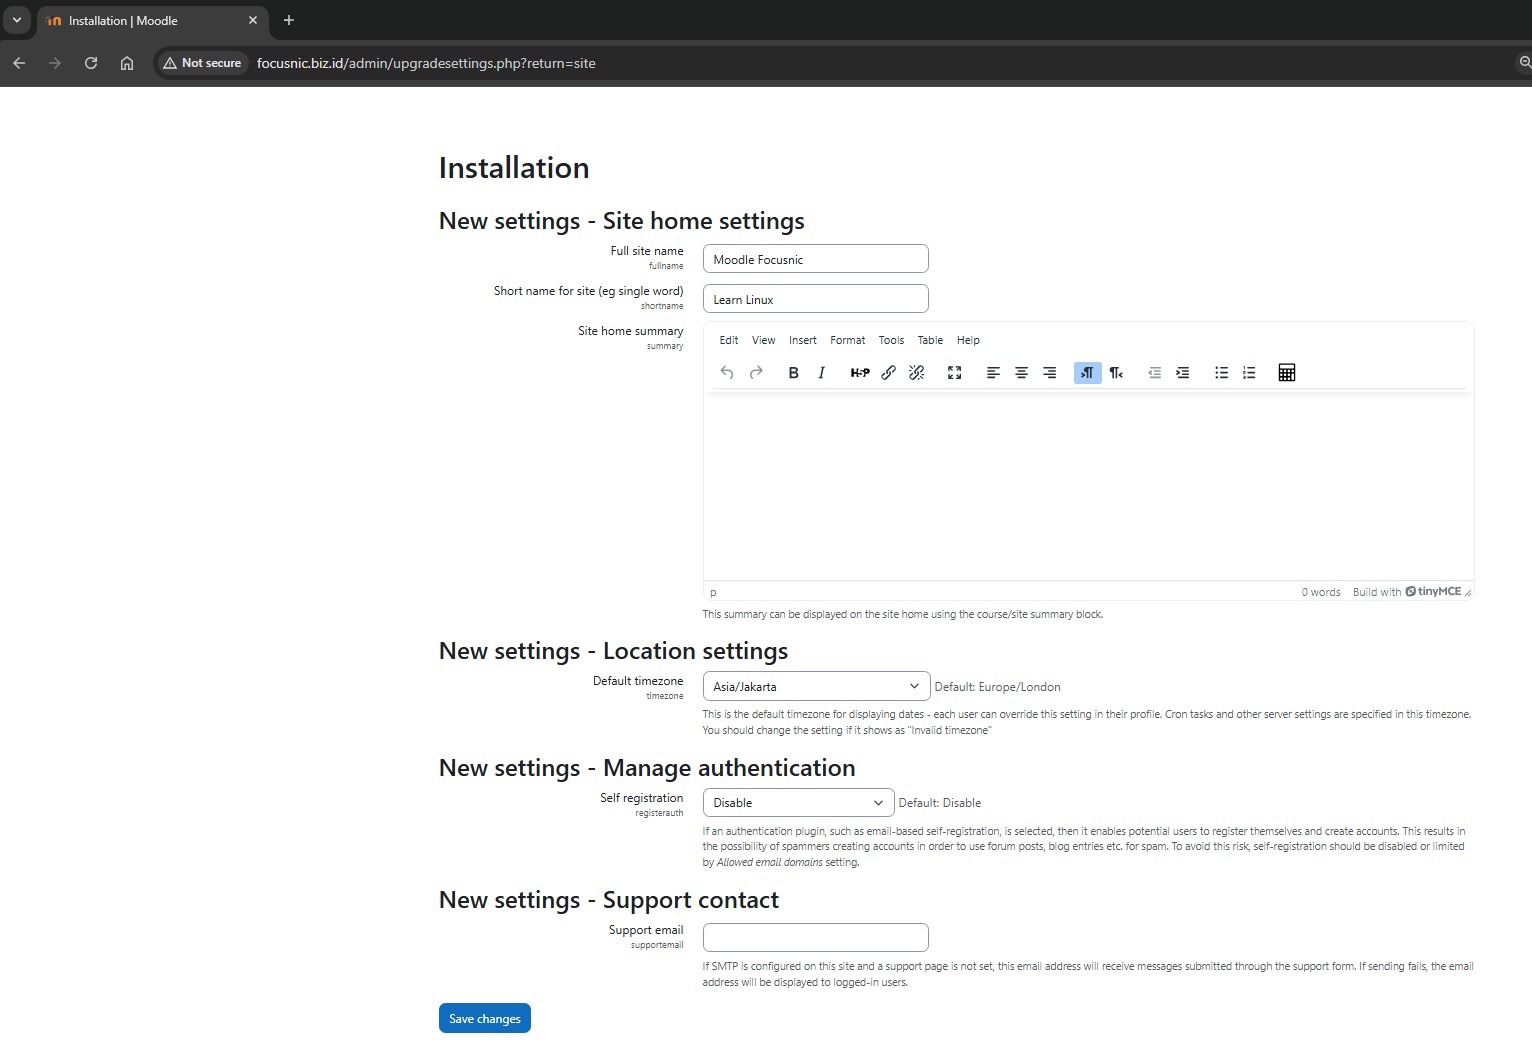
Enter the name of the Moodle home front page, then click "Save changes"
Next, a page will appear to register for Moodle. This is optional; please skip it if you don't want to register for the Moodle installation. The Moodle installation screen will appear below. To log in to the admin page, type the following URL into your browser: http://$DOMAIN/my
Troubleshooting
- File Permission
Unable to upload file, an error appears in the admin interface. Solution:
- Make sure the moodledata directory is outside the
public_htmldirectory. - Ensure permissions and ownership are correct:
chown -R apache:apache /var/www/focusnic.biz.id
chmod -R 770 /var/www/focusnic.biz.id/moodledata
- PHP Extension Not Detected
During installation, Moodle warns that PHP extensions such as intl, soap, or xmlrpc are missing. Install the requested extensions:
dnf install php-intl php-soap php-xmlrpc
Restart php-fpm and Apache:
systemctl restart php-fpm httpd
- Error Database Connection
Make sure the MariaDB/MySQL database is running, and the username, password, and DB have been created and are correct.
Conclusion
Installing Moodle on a LAMP Stack on AlmaLinux 8 is a fairly technical process, but it's very doable by following this step-by-step guide. From installing Apache, MariaDB, and PHP, to configuring Moodle and optimizing its security, everything must be done meticulously to ensure the smooth, secure, and efficient running of this e-learning platform.
If you need a ready-to-use, optimized, and secure Moodle-based e-learning platform, don't hesitate to contact Focusnic. We are ready to assist you with everything from VPS provisioning and Moodle installation to server performance optimization for your online learning needs.
Q: Can Moodle only be installed on AlmaLinux?
A: No. Moodle can also be installed on other distributions such as Ubuntu, Debian, CentOS, and Windows. However, AlmaLinux provides good stability for long-term server needs.
Q: How is Moodle different from other LMSs like Google Classroom?
A: Moodle is a highly flexible, open-source platform that can be self-hosted. Google Classroom, on the other hand, is a cloud-based service with limited features and cannot be customized.
Q: Is Moodle free for educational institutions to use?
A: Yes. Moodle is completely free and open-source, suitable for schools, universities, and corporate training.
Q: Can Moodle handle thousands of users simultaneously?
A: Yes, provided your server has adequate specifications (RAM, CPU, disk I/O) and is optimized.
Q: Can Moodle be installed on shared hosting?
A: Yes, but it's not recommended due to resource limitations and the risk of suspension from the hosting provider. It's best to try using a VPS for greater stability and flexibility.
Q: What is the minimum RAM required for Moodle?
A: A minimum of 2 GB of RAM for a basic installation, but a minimum of 4 GB is recommended for active use.
Q: Can I use Nginx instead of Apache?
A: Yes, but the configuration will be slightly different. This guide specifically addresses Apache.
Q: Is Moodle free?
A: Yes, Moodle is open-source and free to use.
Q: How do I back up Moodle?
A: A backup consists of two parts: files/folders and the database. Use the mysqldump command for the database and copy the moodle and moodledata folders.
Further References: