Complete Guide on How to Install PrestaShop using LAMP Stack on AlmaLinux 8
In the world of e-commerce, PrestaShop has become one of the most reliable open-source solutions for building professional online stores. To achieve maximum performance and stability, one of the best approaches is to install PrestaShop on a LAMP stack (Linux, Apache, MySQL, PHP), particularly on AlmaLinux 8, known as the successor to CentOS, with long-term support and enterprise-grade stability. This guide provides a step-by-step guide to installing PrestaShop using a LAMP stack on AlmaLinux 8, from server setup to final configuration ready for production.
Prerequisites
- Full root access
- Domain (optional)
- Basic Linux Command Line
Preparation
Make sure the firewall and SELinux have been adjusted or temporarily disabled if you want to avoid problems during the initial installation.
Before starting the PrestaShop installation, make sure your AlmaLinux 8 server is up to date and ready to install the LAMP Stack (Linux, Apache, MariaDB, PHP).
dnf update -y
dnf install epel-release -y
Install Apache
Apache is a reliable web server and is widely used in production environments. To install it, run the following command:
dnf install httpd -y
Once the installation is complete, enable and start the Apache service with the following command:
systemctl enable --now httpd
To allow access to the server via HTTP and HTTPS, allow the firewall:
firewall-cmd --permanent --add-service={http,https}
firewall-cmd --reload
Install PHP
PHP (Hypertext Preprocessor) is a server-side programming language that is crucial in this stack. We will install PHP 8 from the Remi Repository to use the latest version of PHP.
Run the following command to install the Remi Repository:
dnf install -y https://rpms.remirepo.net/enterprise/remi-release-8.rpm
Then list the available PHP using the following command:
dnf module list php
Output example:
AlmaLinux 8 - AppStream
Name                            Stream                              Profiles                                              Summary
php                             7.2 [d]                             common [d], devel, minimal                            PHP scripting language
php                             7.3                                 common [d], devel, minimal                            PHP scripting language
php                             7.4                                 common [d], devel, minimal                            PHP scripting language
php                             8.0                                 common [d], devel, minimal                            PHP scripting language
php                             8.2                                 common [d], devel, minimal                            PHP scripting language

Remi's Modular repository for Enterprise Linux 8 - x86_64
Name                            Stream                              Profiles                                              Summary
php                             remi-7.2                            common [d], devel, minimal                            PHP scripting language
php                             remi-7.3                            common [d], devel, minimal                            PHP scripting language
php                             remi-7.4                            common [d], devel, minimal                            PHP scripting language
php                             remi-8.0                            common [d], devel, minimal                            PHP scripting language
php                             remi-8.1                            common [d], devel, minimal                            PHP scripting language
php                             remi-8.2                            common [d], devel, minimal                            PHP scripting language
php                             remi-8.3                            common [d], devel, minimal                            PHP scripting language
php                             remi-8.4                            common [d], devel, minimal                            PHP scripting language

Hint: [d]efault, [e]nabled, [x]disabled, [i]nstalled
Enable the desired PHP module version. For example, for PHP 8.4, run the following command:
dnf module reset php -y
dnf module enable php:remi-8.4 -y
Once the repository is active, we can proceed with installing PHP along with the commonly used essential modules:
dnf install -y php php-cli php-common php-mysqlnd php-fpm php-opcache php-gd php-curl php-mbstring php-xml php-json php-soap php-bcmath
Check the installed PHP version with the following command:
php -v
Install MariaDB
MariaDB is a replacement for MySQL and is compatible with MySQL-based applications. Run the following command to install it:
dnf module list mariadb
Output example:
AlmaLinux 8 - AppStream
Name                                Stream                               Profiles                                               Summary
mariadb                             10.3 [d]                             client, galera, server [d]                             MariaDB Module
mariadb                             10.5                                 client, galera, server [d]                             MariaDB Module
mariadb                             10.11                                client, galera, server [d]                             MariaDB Module

Hint: [d]efault, [e]nabled, [x]disabled, [i]nstalled
The output above shows that the default version of MariaDB is 10.11 (the latest version from the OS). However, we'll use MariaDB version 11.4.7 using the official repository at https://mariadb.org/download/ and then reset MariaDB to remove it from the OS's default repository:
dnf module reset mariadb
Run the following command to add the MariaDB version 11.4.7 repository:
nano /etc/yum.repos.d/MariaDB.repo
Add the following parameters:
# MariaDB 11.4 RedHatEnterpriseLinux repository list - created 2025-07-31 14:04 UTC
# https://mariadb.org/download/
[mariadb]
name = MariaDB
# rpm.mariadb.org is a dynamic mirror if your preferred mirror goes offline. See https://mariadb.org/mirrorbits/ for details.
# baseurl = https://rpm.mariadb.org/11.4/rhel/$releasever/$basearch
baseurl = https://mirror.its.dal.ca/mariadb/yum/11.4/rhel/$releasever/$basearch
module_hotfixes = 1
# gpgkey = https://rpm.mariadb.org/RPM-GPG-KEY-MariaDB
gpgkey = https://mirror.its.dal.ca/mariadb/yum/RPM-GPG-KEY-MariaDB
gpgcheck = 1
Then run the following command to install MariaDB:
dnf install MariaDB-server MariaDB-client
Enable and activate the MariaDB service:
systemctl enable --now mariadb
systemctl status mariadb
Before using it for production or testing, it is best to secure the MariaDB installation first by running the following command:
mariadb-secure-installation
Then follow the instructions that appear:
- Enter current password for root (enter for none) → [ENTER]
- Switch to unix_socket authentication → Y
- Change the root password? → Y
- Remove anonymous users? → Y
- Disallow root login remotely? Y
- Remove test database and access to it? Y
- Reload privilege tables now? Y
Install PrestaShop
Before installing the latest version of PrestaShop 8, we'll first create a virtual host and database (to store PrestaShop content, configuration, and structure). Run the following command to create a virtual host:
Make sure you're using a valid domain (FQDN) and that the DNS A record is pointed to the server IP address used on your server.
nano /etc/httpd/conf.d/focusnic.biz.id.conf
Fill in the following parameters:
<VirtualHost *:80>
    ServerAdmin webmaster@focusnic.biz.id
    ServerName focusnic.biz.id
    ServerAlias www.focusnic.biz.id
    DocumentRoot /var/www/focusnic.biz.id/public_html

    <Directory /var/www/focusnic.biz.id/public_html>
        AllowOverride All
        Require all granted
    </Directory>

    ErrorLog /var/log/httpd/focusnic.biz.id-error.log
    CustomLog /var/log/httpd/focusnic.biz.id-access.log combined
</VirtualHost>
Then create a directory on the virtualhost above:
mkdir -p /var/www/focusnic.biz.id/public_html
Restart Apache to save changes:
apachectl configtest
systemctl restart httpd
Create a database by running the following command:
mariadb
Then run the following command to create a database, user, and password:
create database prestashop_db;
create user 'prestashop_user'@'localhost' identified by 'M8bHbTF2SAs2kMz3';
grant all on prestashop_db.* to 'prestashop_user'@'localhost';
flush privileges;
quit;
Download the PrestaShop file and place it in the appropriate directory on the virtual host:
cd /var/www/focusnic.biz.id/public_html
wget https://github.com/PrestaShop/PrestaShop/releases/download/8.2.2/prestashop_8.2.2.zip
unzip prestashop_8.2.2.zip
Adjust permissions:
find /var/www/focusnic.biz.id/public_html -type f -exec chmod 644 {} \;
find /var/www/focusnic.biz.id/public_html -type d -exec chmod 755 {} \;
chown -R apache:apache /var/www/focusnic.biz.id
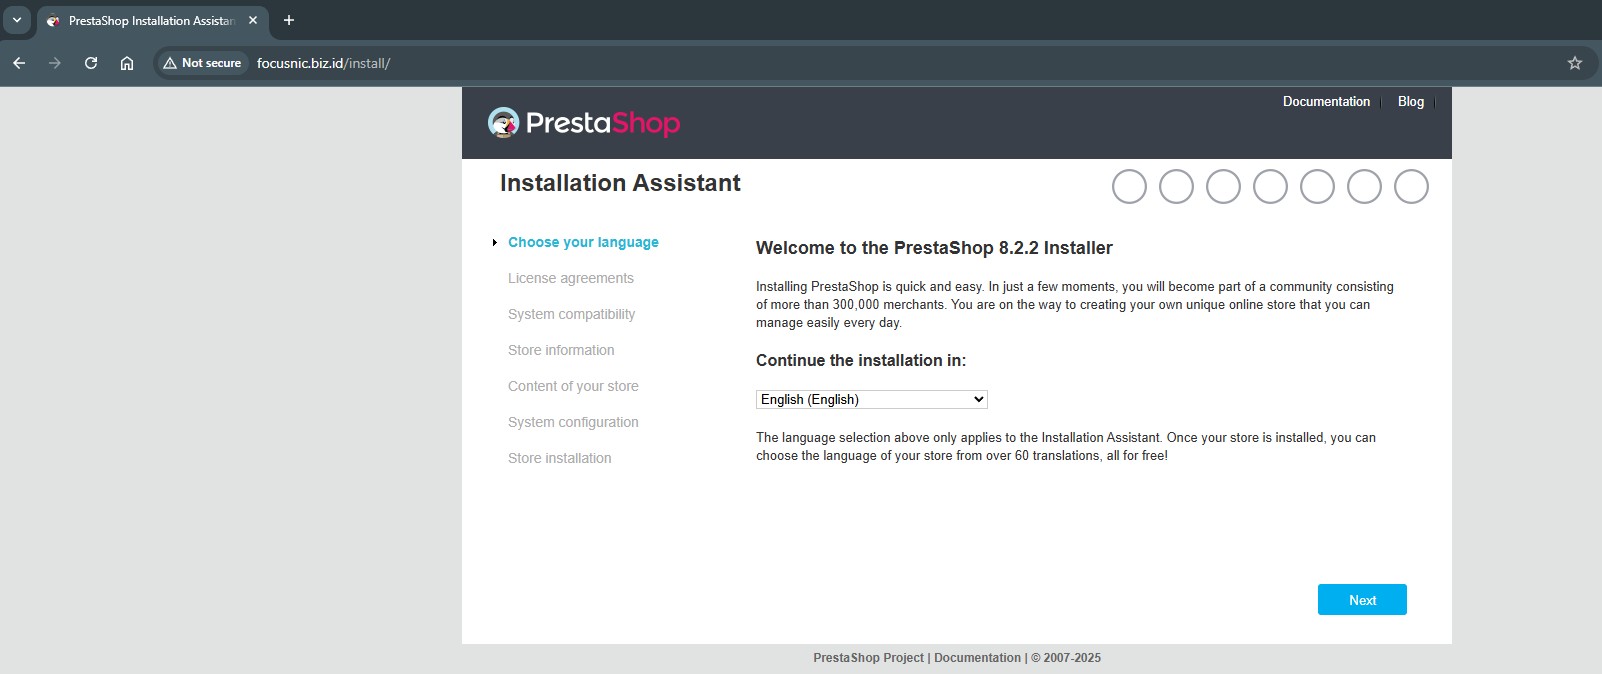
Access the PrestaShop installation via a browser, for example: http://focusnic.biz.id wait until the unzipping process is complete then select the language and click "Next"
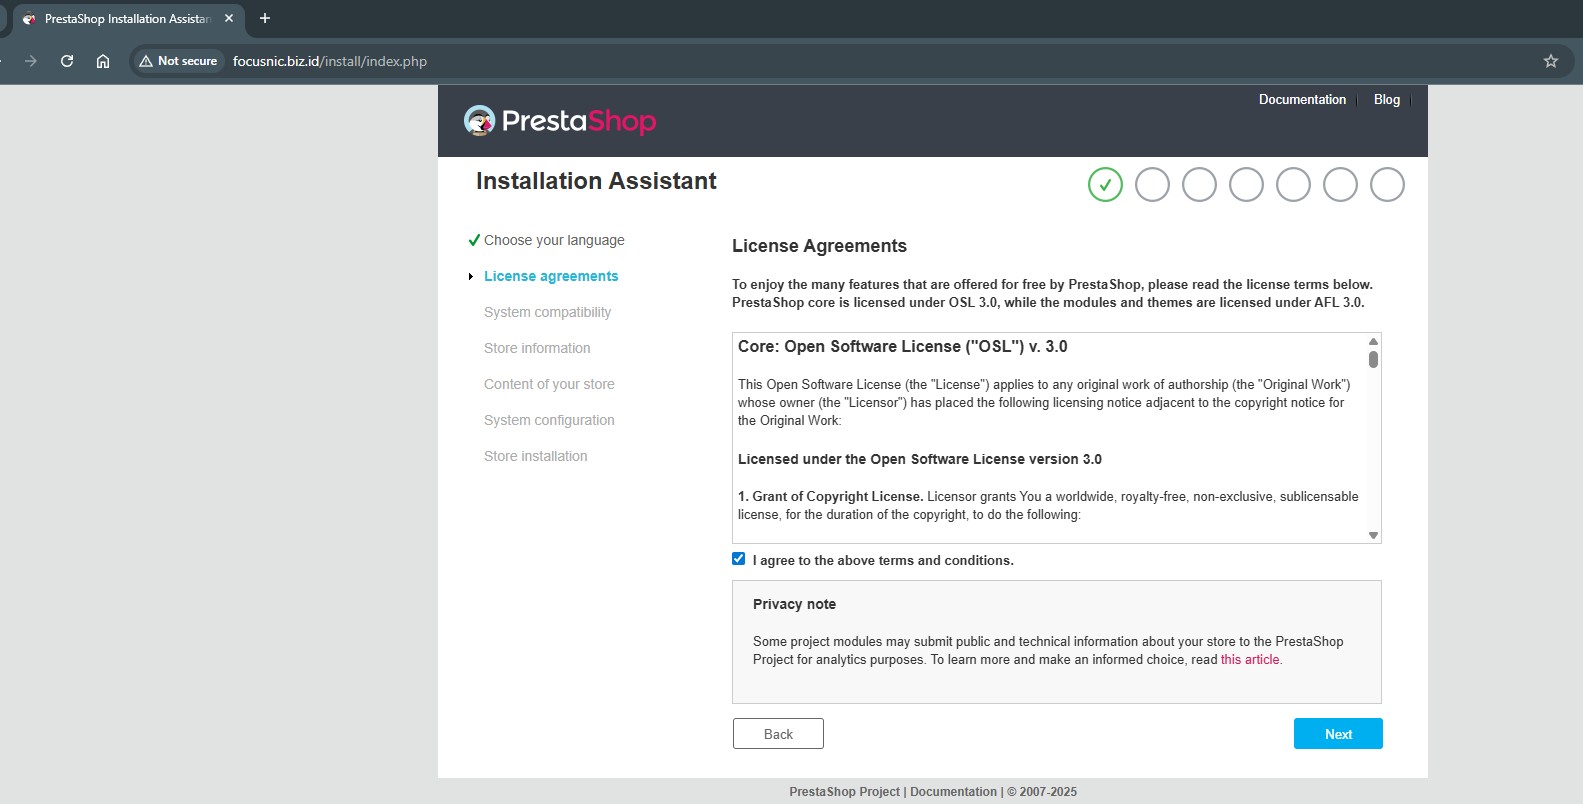
Agree to the license agreement then click "Next"
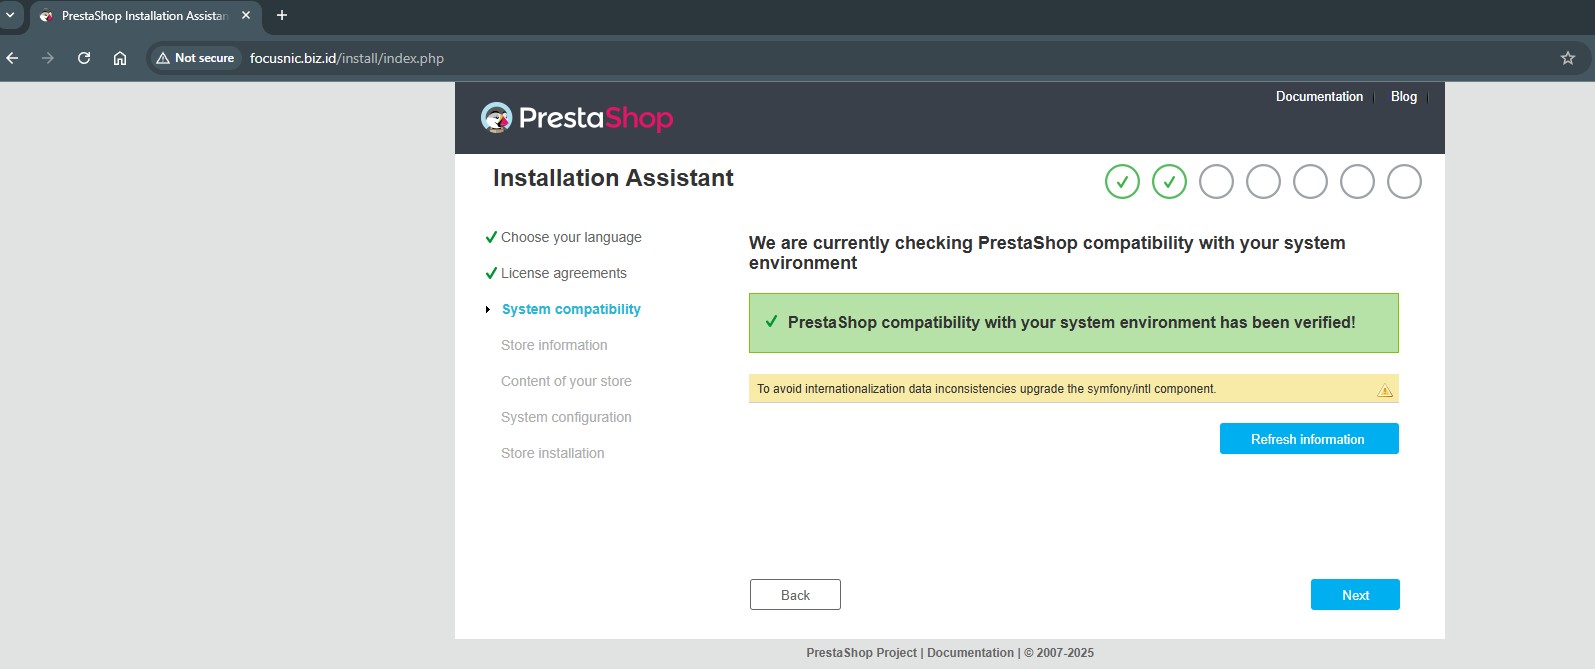
Prestashop compatibility checker make sure the status is as follows, then click "Next"
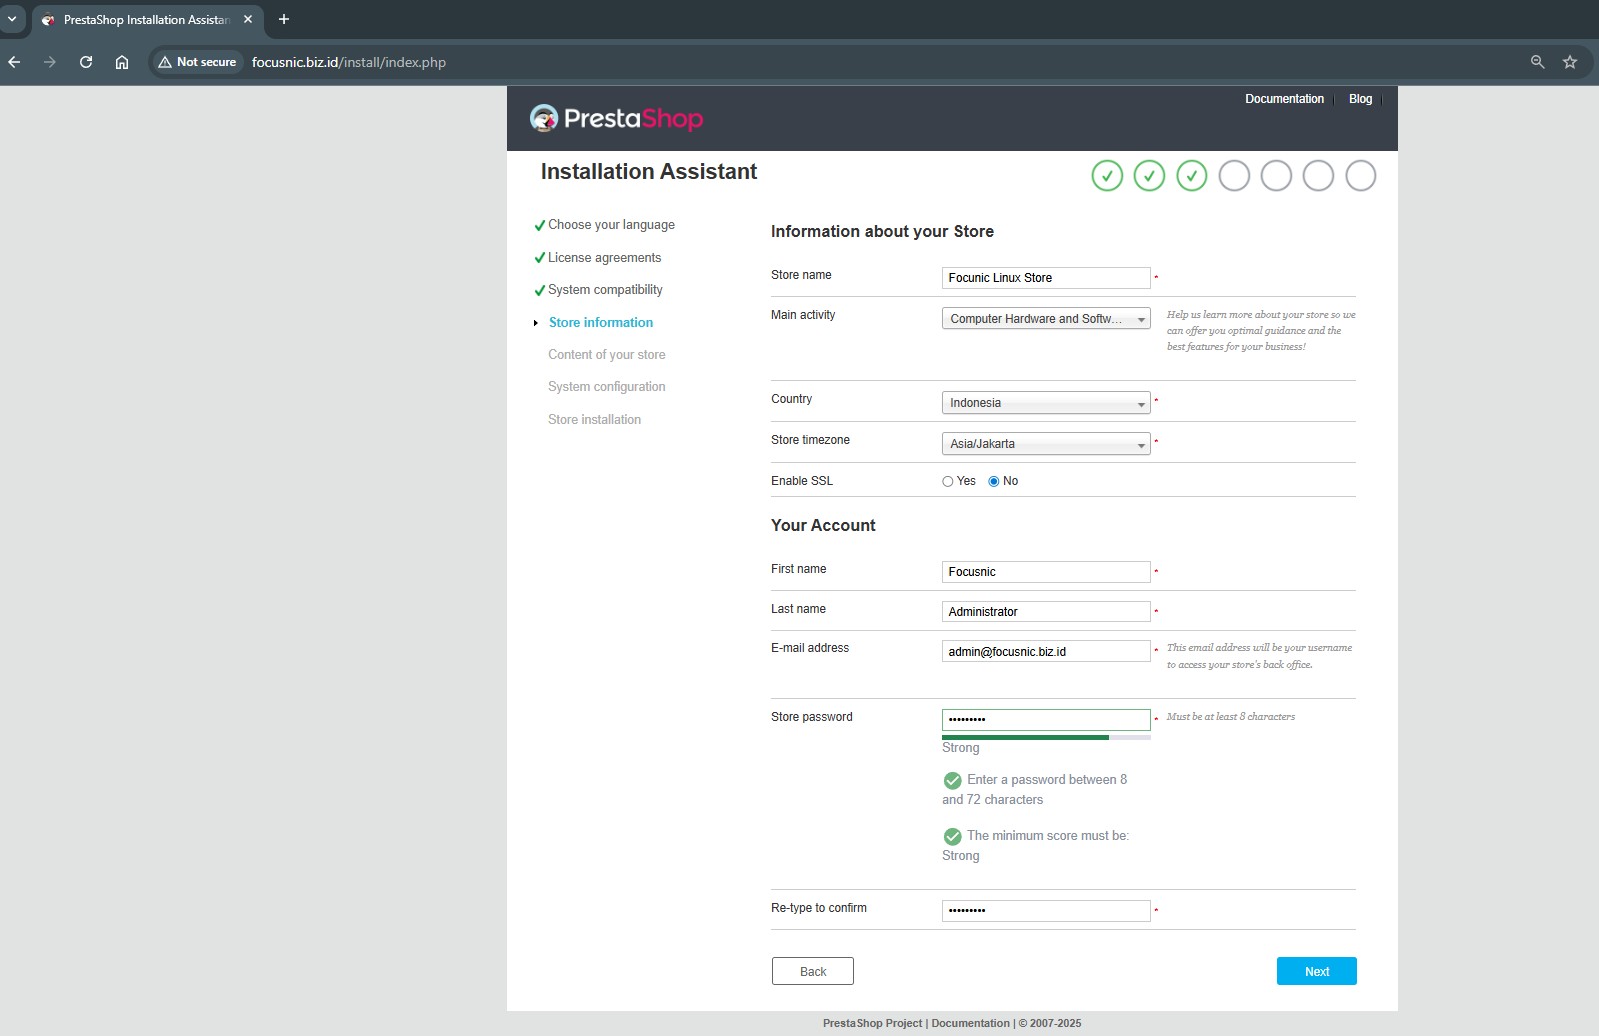
Fill in PrestaShop information
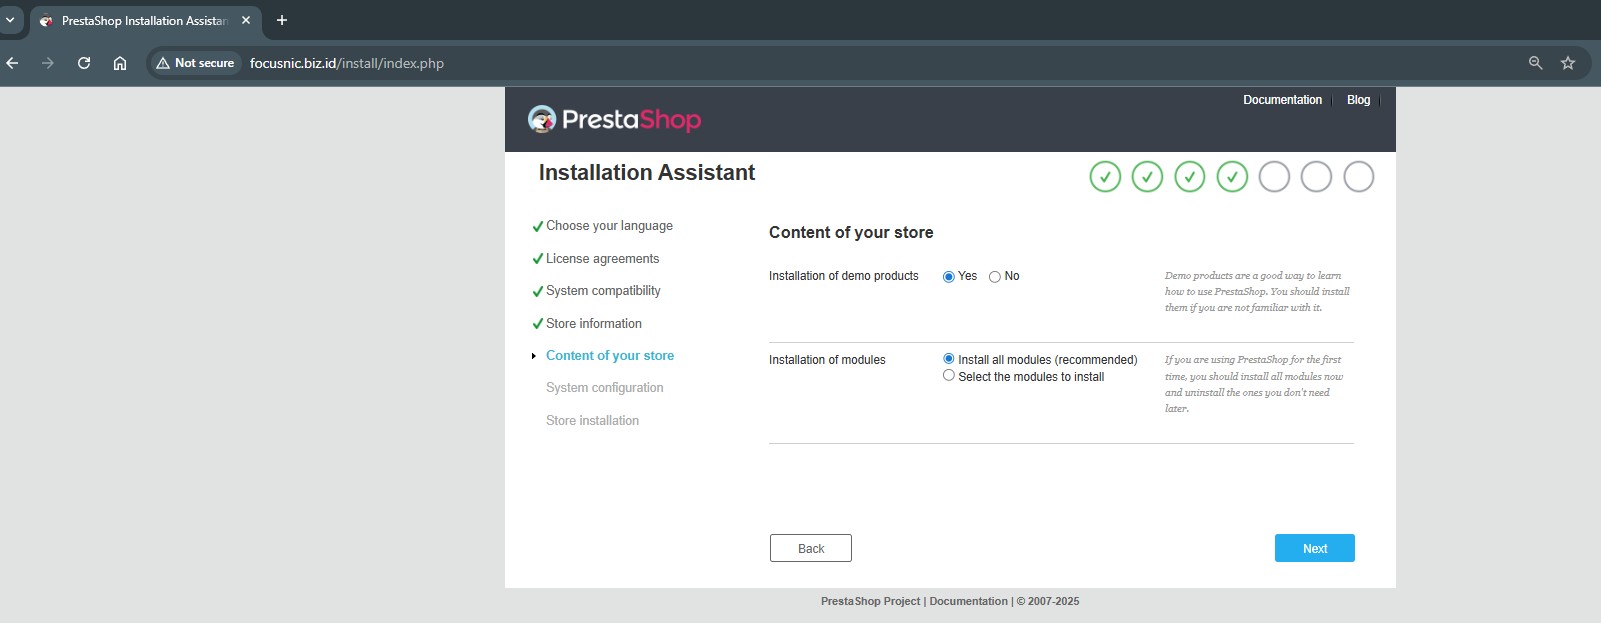
PrestaShop content configuration
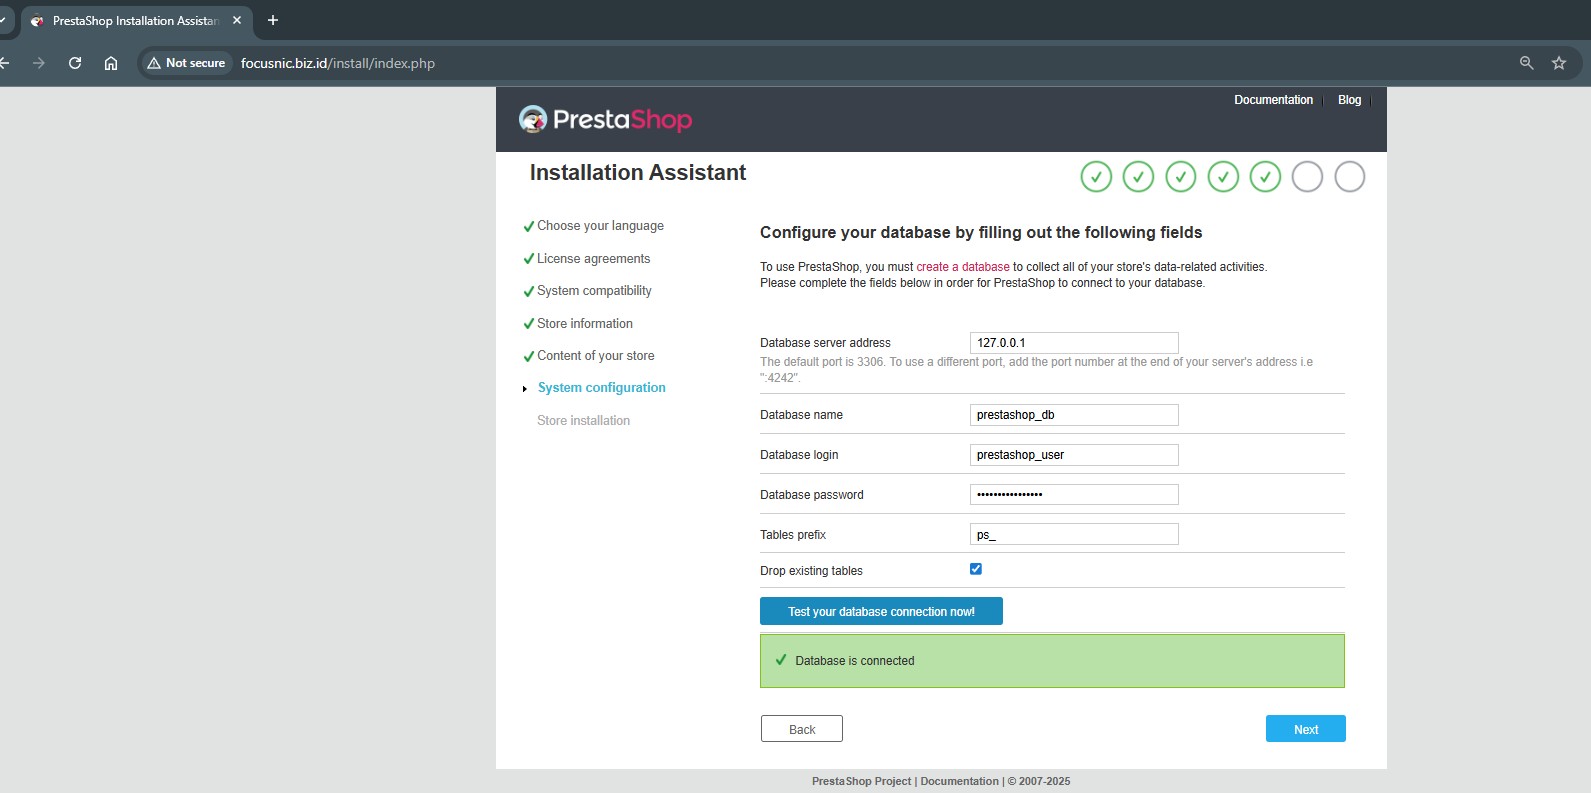
Fill in the previously created database information such as db, username, and password
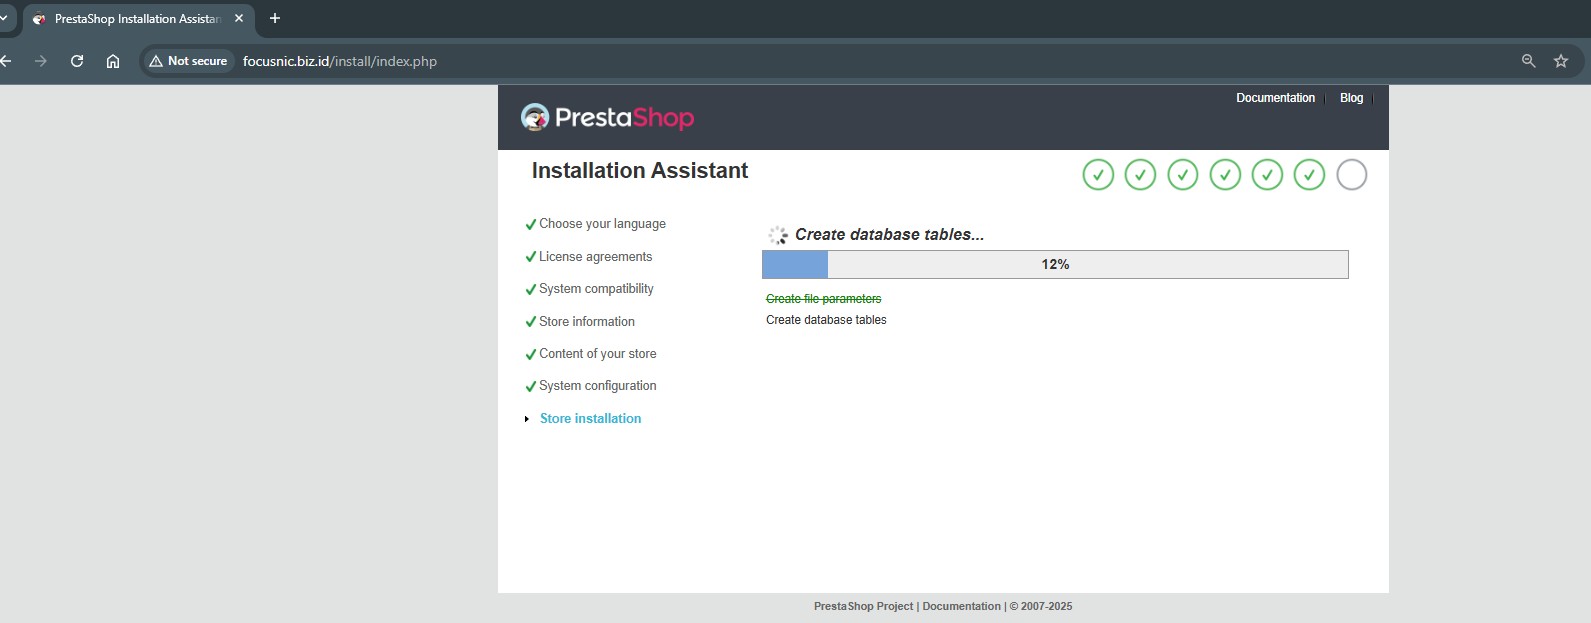
Wait for the PrestaShop installation process to complete
Open the terminal and then delete the installation folder with the following command:
rm -rf /var/www/focusnic.biz.id/public_html/install/
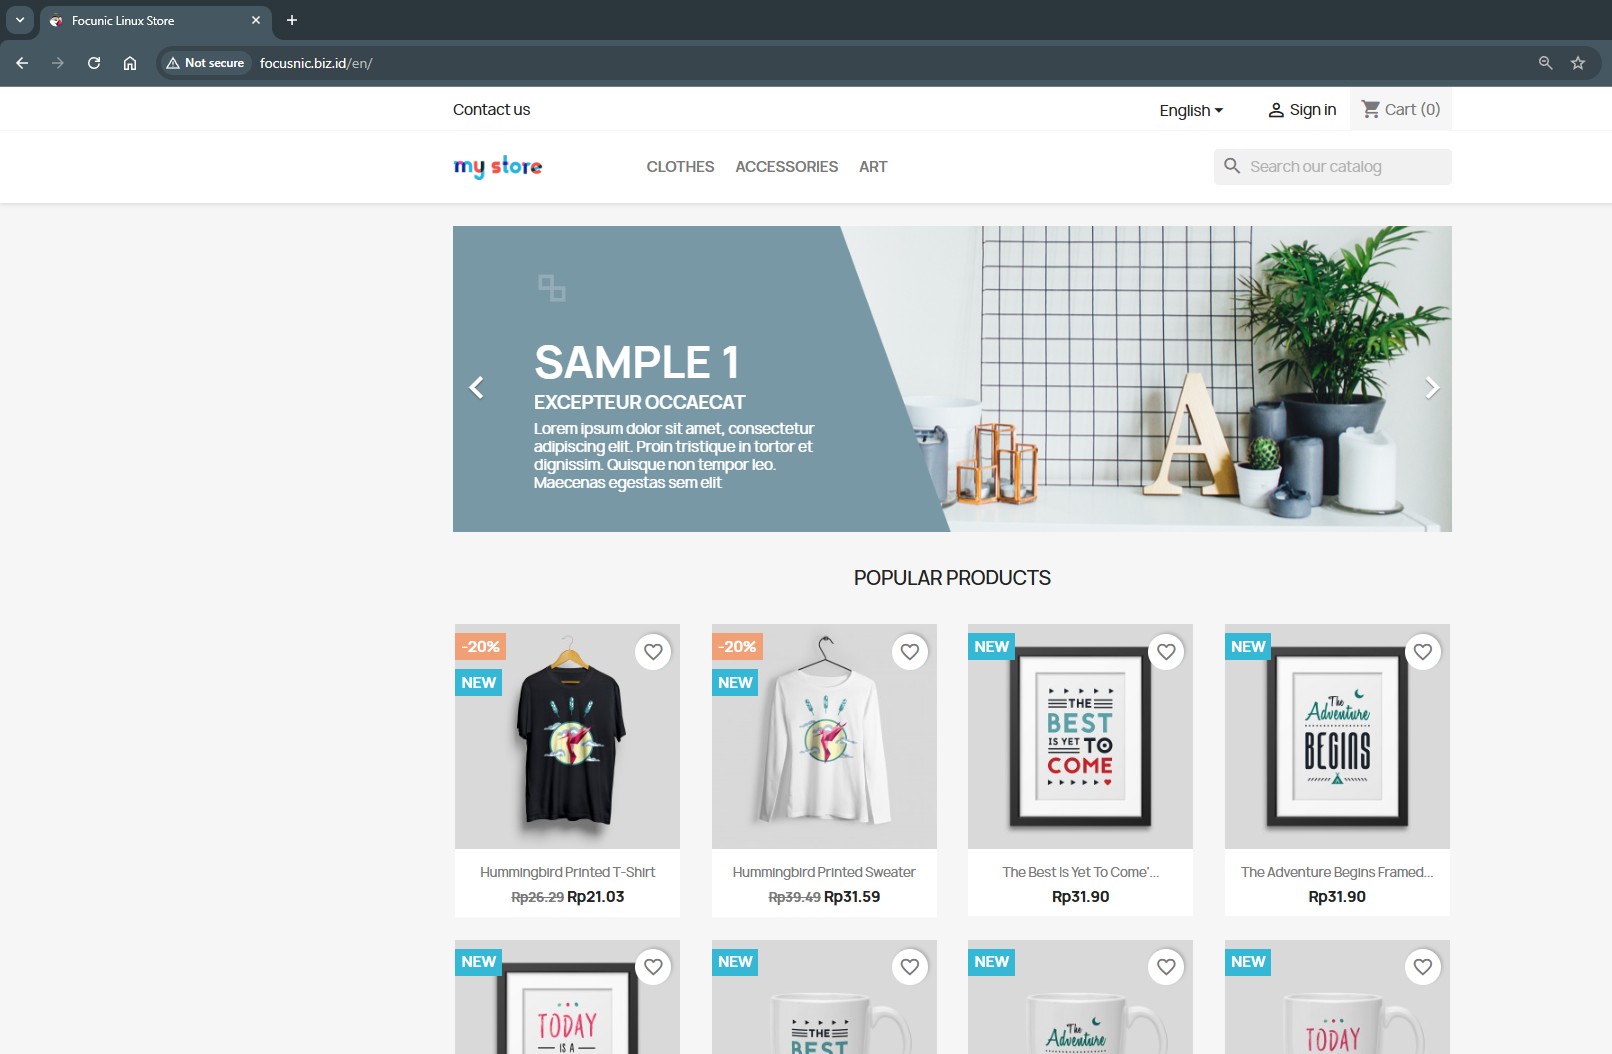
Here is the Front view of PrestaShop
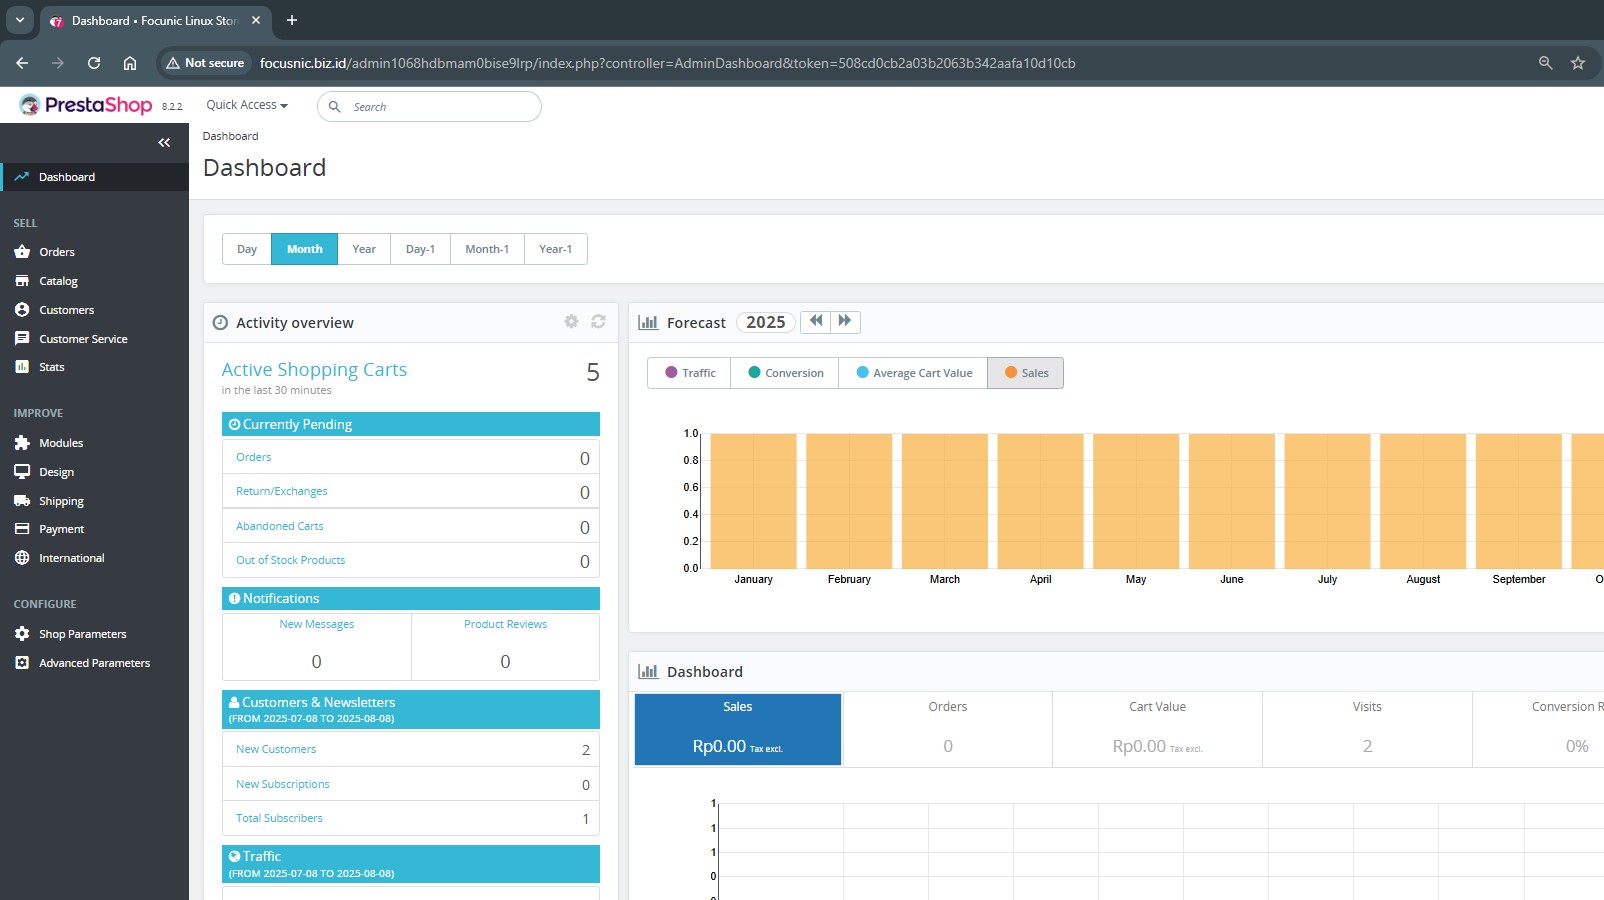
To go to the PrestaShop admin page, please type the following URL in the browser http://$DOMAIN/admin then PrestaShop will create a random admin URI for subsequent access randomize to make it more secure.
Troubleshooting
- 500 Internal Server Error
Check the log at /var/log/httpd/focusnic.biz.id-error.log for error details.
- Database Connection Error
Make sure the user and database have been created correctly.
- Folder Permission Error
Repeat the chown and chmod commands to ensure the file permissions are correct:
find /var/www/focusnic.biz.id/public_html -type f -exec chmod 644 {} \;
find /var/www/focusnic.biz.id/public_html -type d -exec chmod 755 {} \;
chown -R apache:apache /var/www/focusnic.biz.id
- PHP Extension Missing
Run php -m and make sure all modules like intl, curl, mbstring, and others are available.
Conclusion
Installing PrestaShop using the LAMP Stack on AlmaLinux 8 is a smart choice for those seeking high performance, stability, and full flexibility in building an online store. With the combination of Apache, MariaDB, and PHP, along with the stable AlmaLinux operating system, you'll have a solid foundation for your e-commerce business.
For those of you who want to focus on running your business without the hassle of server installation, don't hesitate to use Focusnic's server installation or Cloud VPS services — a trusted solution for your digital infrastructure needs.
Q: Is PrestaShop free?
A: Yes, PrestaShop is an open-source platform and can be used for free.
Q: What are the minimum server specifications for PrestaShop?
A: A minimum of 2GB of RAM and 1 vCPU. However, 4GB+ is recommended for more stable performance.
Q: Does PrestaShop support Indonesian?
A: Yes, PrestaShop supports many languages, including Indonesian.
Q: Can I use Nginx?
A: Yes, but in this guide, we'll focus on using Apache (LAMP Stack) because it's more common and widely supported by the PrestaShop community.
Further References: